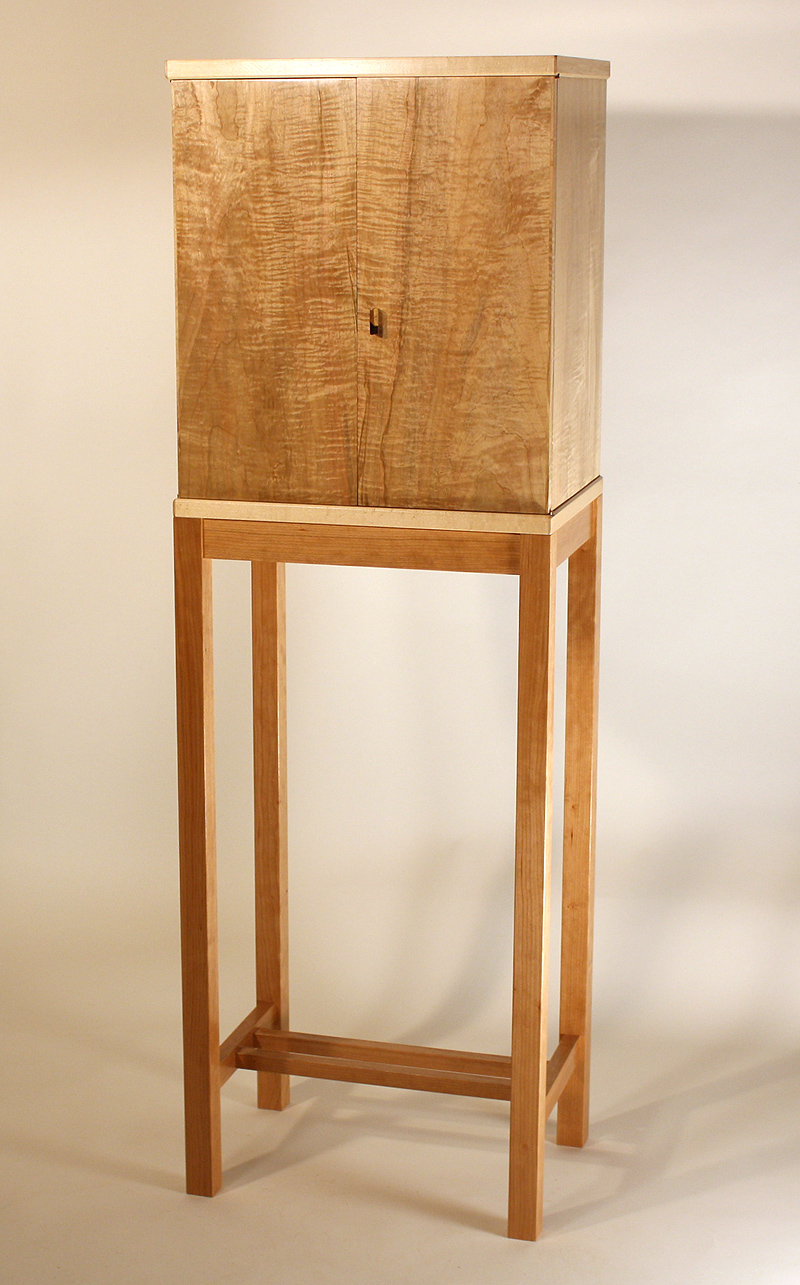
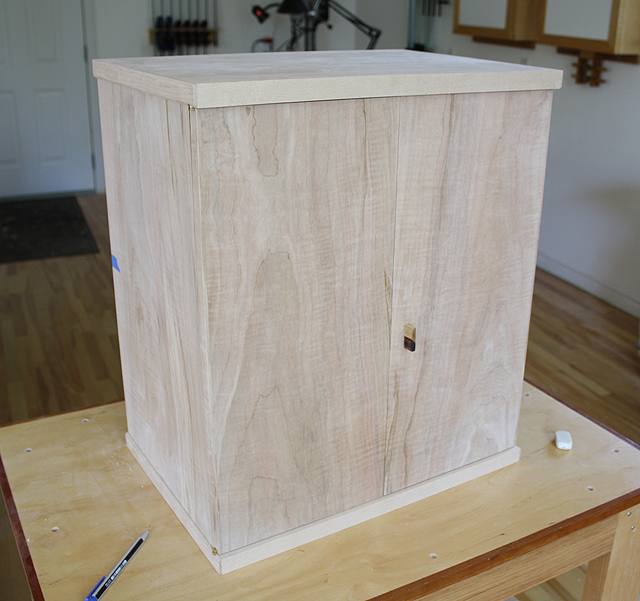
I haven't abandoned my blog... just been very busy participating in exhibitions lately. Most of the work I have created recently was intended for these exhibitions so I'm not currently making much furniture to speak of. I like alternating between functional and non-functional work. The non-functional allows me to push the boundaries of my creativity as the work is more free-flowing and not restricted to formal designs. This particular work is primarily wall art as well as sculptural work. I can't decide which of these forms of art I prefer making :) Typically when I have a vision of a particular piece of art I attempt to create it within a short period of time so as not to lose the vision. Of course, I can work from sketches I have drawn but I need to seize the moment sometimes. I'm incorporating more curves in my sculptural work now as these sculptures evolve from my earlier work.
I'm also working with more colour in my wall art as I feel it brings out the beauty of the woods I use. I've been trying to work within a theme as much as possible.. for at least a few of my pieces. This makes the work more exciting to look at as opposed to a few random pieces of art assembled together. Since I am considered an emerging artist at this time, I'm still developing my style and voice. I can also get away with more experimentation. The exhibitions also allow me to meet many interesting people, artists who follow their passion. The talk is not of careers and money, but instead the love of creating art and objects of beauty and the pure enjoyment derived from this.
 If you have perused my web site, you've probably noticed I also create wood art in the form of sculptures and wall art. Since this form of art is not quite as technical as creating studio furniture.. I can express myself through the creation of this free-form wood art. This is often a welcome break from the structured process of creating studio furniture. Recently, I have had the need to create two sculptures which follow a theme. These particular sculptures are different from one another but are related as to the theme and vision I am trying to put forward. With their small size and minimal need for materials such as wood, sculptures instead allow me to focus instead on the art itself. I select wood which has interesting graphics and a cohesive grain pattern. The wood blanks are typically large in dimensions, allowing me ample material to sculpt the components of the sculpture. Often the sculpting process can be somewhat of a challenge when I use compound curves.
 When I create sculptural work I usually start with a sketch and move on to creating the sculpture directly from the sketch. I don't bother with maquettes or mock ups since at least for me, the sculpture is not too far removed from a sketch. The proportions are not critical as with studio furniture, they need to instead work to represent the intended vision. Once I flesh out a design for a sculpture through a series of sketches, the fun begins. How to turn a sketch into a 3-D object. How to sculpt an object out of wood to represent an image without going overboard; without inserting too many elements into the design. The saying "less is more" often applies to sculptural work. How to create this sculptural work with minimal elements, only enough to put the image or vision forward. I often alternate between creating studio furniture and other forms of wood art, this keeps the monotony to a minimum and allows me to express myself with minimal structure and technical details... a very liberating feeling!
 I've been working on the joinery for the upper rails of the cabinet stand. There aren't too many option for joinery for this cabinet stand since the stand is supporting the weight of the cabinet as opposed to coffee table legs for example. I decided on conventional mortise and tenon joinery since it is time proven and has the benefit of being a strong, mechanical joint and capable of any racking forces. My procedure is to mark out the mortises in each of the legs. Each of the legs will have mortises in two adjacent faces to be able to join a short and long apron rail. I also select which side of the apron rails I want to face outward at this point as well as orienting the legs in their most aesthetically pleasing faces.
 The mortises are offset from the top of the legs some distance to maintain sufficient solid wood between the end of the tenon and the top of the leg. To offset the resulting, shorter tenon I offset the bottom of the tenon a smaller distance to the bottom of the apron rails. This allows for a wider tenon than if I had made the tenon symmetrical. I typically rough cut the tenons slightly larger than the mortise and then trim them to fit tightly into its mating mortise. Measuring and marking cannot be stressed enough for this operation, the final dimensions of the stand need to be exactly the same as the bottom of the cabinet in my design. The tenons of two adjoining apron rails meet in each of the legs at a right angle. To accommodate this within the mortise housing I saw a 45 degree angle out of each of the tenon ends. The result is two of the rails meeting at 90 degrees within the mortise housing.
The markings for these cuts can be seen in the top photo. In the bottom photo, I test fit all the tenons and mortises and can now proceed to the next phase of creating the bottom stretchers for the cabinet stand. I also have not cut the legs down to their final length quite yet, I will also be doing this next once I decide on a final height for the cabinet.
 I have begun to work on the cherry stand for the ambrosia maple cabinet in the past few days. This involves preparing all the components of the stand. I usually cut some blanks or components from one cherry plank and let the smaller blanks acclimatize and settle down over a period of a few days. This allow any hidden tension in the wood to be released. Over this time, I slowly dimension these wood blanks down to very close to their final dimensions. Another reason for sawing all the components for the cabinet stand is to maintain colour consistency throughout. Although the cabinet stand will be in cherry, black cherry varies considerably from tree to tree in colour and tone. This cabinet stand design calls for a set of upper rails mortised into the legs. If I chose to have these upper rails as the sole cross-support for the stand, they would need to be fairly wide and the aesthetics of this do not please me.
 Rather than this, I have decided on narrower top apron rails and move some support to the bottom of the stand in the form of stretchers instead. The aesthetics of this are more pleasing to me, very much like dividing the load at the top and bottom of the cabinet stand.The leg dimensions remain the same, instead I divide the original upper rails into two components per rail and use the narrower component at the bottom of the stand. The strength and integrity of the cabinet stand should be maintained with this design along with more pleasing aesthetics, and more subtle, smaller components.
The leg blanks are cut to exhibit a rift-sawn pattern. This ensure that each face of each leg displays straight grain instead of a cathedral type grain pattern. I carefully marked out a large cherry plank to be able to accomplish this. The inner core of the plank will be used for the top and bottom rails. Since the plank was thicker than 8/4, I am therfore able to cut the rail pieces on edge therefore ensuring a quarter-sawn appearance. This ensure straight, consistent grain throughout. In the photos, I outline the grain pattern I will be using. Next, I will continue to prepare the stand components down to their final dimensions and then mark and cut the joinery for the stand. I should have the stand assembled within the next two to three days.
 After a few days delay I continued the shaping process for the pulls and fitted them to each of the drawers as well as the right-hand door of the cabinet. To maintain consistency and harmony I oriented the pulls in the same way, with the lighter color at the right of the drawers. Locating the pull mortises is an important step since the pulls need to be located similarly on the drawer fronts or it would be kind of obvious something maybe went wrong. At least this is my thinking. I carefully marked the mortises and checked their locations with the drawers in their respective drawer compartments. The pulls fit into the mortises with a snug fit as this is my goal.
 Afterwards, I fitted the remaining pull to the right-hand door of the cabinet. To get away from absolute symmetry and to make more of the door graphics visible when looking down, I located the door pull slightly lower than center. After installing this door pull, I feel I have succeeded in this effect. A single door pull confirms that it is the right-hand door that needs to be opened first, as the door lip orientation demands this. Having a single door pull also creates a cleaner cabinet front and evokes uniqueness, mystery and a non-conforming design, since the large majority of cabinets in existence have two pulls. Next, I continue scraping the interior to a point where I can begin applying finish. As well, I need to create an edge treatment at the front of the tops and bottom of the cabinet. I had purposely left this until now in case I needed to perform any trimming of the front of the top and bottom. The edge treatment will be a small chamfer which is continuous with the sides of the cabinet. Any trimming is better determined with the doors in place.
 I've been working on the drawer pulls since my last post. This involves designing the pulls, selecting the preferred wood to use for the pulls, deciding on a size for the pulls, laying out the pulls, and shaping them. I have to admit this is one of my most enjoyable processes. Pulls often add considerably to a cabinet both in aesthetics and design. The pulls are often a draw to the cabinet if they complement the cabinet yet impart a unique addition to the cabinet. The pull design I came up with is a rectangular one with a tenon extending out. The pulls are of mixed cocobolo so both heartwood and sapwood create a nice contrast in colors. The tenon has shoulders on four sides to overlay the drawer front. This tenon fits into a matching mortise in the drawer front. The mortise is marked and created using hand tools, namely small chisels.
 Creating the tenon is meticulous work and I used a small, fine saw to delineate the tenon from the actual pull area. Once this is done, I use a skew rabbet block plane and some small chisels to shape the sides of the tenon. The important part of this sequence is to accurately mark the mortise to fit the tenon. A mistake here could ruin the drawer front or involve a re-design of the pulls to correct the error. The tenons of the drawer pulls fit tightly into the mortise and then glued in. I also take some time to orient the drawer pull graphics and orientation to match each other.
After completing and installing the three drawers pulls I proceeded to the right hand door of the cabinet. This door pull is similar to the drawer pulls to maintain harmony in the design. This design involves one pull on this door to distinguish this door as the one to open first. I've always liked the idea of having a single pull on the cabinet front, it just looks like a clean, minimalist design. This door pull is also slightly offset towards the bottom of the door to minimize any impact it might have on the door graphics as more of the door graphics are now visible above the door pull.
 Creating and fitting the drawer bottoms was the last step for me in the drawer creation process for the cabinet. The conventional approach for installing drawer bottoms is to create a groove in each of the sides as well as in the drawer front. These grooves are carefully marked to maintain enough material below the groove while keeping the groove itself as low in the drawer as possible. Another consideration in the location of these grooves is to not affect the dovetail joint, or at least the visible part of the joint. Once this is performed I needed to create the drawer bottoms.
The drawer bottoms fit into the grooves in the sides and drawer front. The drawer bottom is accurately fitted so the grain orientation is from front to back. This allows the drawer bottom to remain tight in the grooves and instead any movement is directed towards the back of the drawer bottom. The thickness of the drawer bottoms is another consideration. I wanted to maintain strength in the bottom but at the same time make the bottoms fit into the narrow grooves. This is accomplished by rabbeting the drawer bottoms to fit the grooves while the rest of the drawer bottom remains thicker, in this case a little over 1/8 inch thicker. The rabbets are also created while maintaining a small reveal in the two sides and the drawer front. This can be seen in the above photo. The drawer bottoms are now strong, fit tightly, are replaceable, and are pinned to the back of the drawer. The drawer bottoms are loosely pinned to the drawer backs to allow for wood movement.
Next I will continue to fine tune the fit of the drawers into their respective drawer compartments and then I will create and fit the drawer pulls.
 I completed the dovetails for each of the three drawers and began the meticulous work of assembling the drawers and fitting them to their respective compartments in the cabinet. Sometimes when I begin to saw and carve out dovetail joints I can go on and on, it is such a peaceful and fulfilling process. I never tire of staring at very good, tight dovetail joints. A few of the steps involved in assembling and fitting drawers are fitting the drawer sides to the drawer fronts. The sides need to be square to the fronts in two planes.
I created rabbets in each of the drawer sides as well as the fronts of each drawer. The back of the drawer has an opening which allows me to slide a custom fit drawer bottom in and pin it to the drawer back. This is a time-proven technique which allows me to replace the drawer bottom if necessary at some point in the future. It also allows for wood movement as the drawer bottom grain orientation is front to back and such is not placing any undue stress on the drawer itself.
The fitting procedure is a bit time-consuming as this is part of the process and a necessary one. I have a couple of the drawer dimensions ever so slightly oversize to allow me to tune the fit to the compartment. Better slightly oversized than undersized. I handplane the sides down to fit the compartment and lightly trim the top and bottom as well. One of the drawers to the right has a lower lip which also needs to be tune to the bottom drawer top, to create a minimal gap yet provide an allowance for wood movement. The drawer bottoms, which I have yet to create, will have rabbeted sides to fit the drawer grooves. This allows me to maintain a thicker drawer bottom yet rabbeted to fir the sides and front of the drawer. I'll continue on with this procedure and begin to give thought to the drawer pulls.
 In the last post I had designed and created the three drawer compartments. Since then I have cut the parts for the individual drawers and begun the process of dovetailing the fronts to the sides of the drawers. Fitting of the drawers into their respective compartments can be a time-consuming process. Instead, by carefully measuring the parts to more precisely fit the compartments, much of the final fitting is reduced. This is my approach, I mark and measure precisely and then lay out the dovetails. In this case I went a step further by creating a test joint using similar components as the actual drawers. I do this for a couple of reasons. One is to determine the best dovetail placement and spacing and secondly to prepare the two marking gauges and the divider I use to mark and create the dovetails. The dovetails are of the half-blind type, referring to the fact that the tails are hidden or set back in the pins. This type of dovetail hides the joint from the drawer front face and is more elegant than through dovetails.Creating dovetails is an enjoyable process and a few precision tools are involved: different sizes of chisels, a fine dovetail saw, marking tools, a small block plane, etc. In one case, a drawer has a small lip overhanging the drawer divider so there is more of a challenge with this particular one.
There is little to no margin for error as the joints need to be perfectly fit. The pin marking need to be offset from the bottom by the width of the overhang or lip. I make most of the adjustments of the dovetail joints within the hidden part of the joint.In the photo you can see one complete drawer, a smaller test drawer and the components of another drawer being prepared.

 I haven't abandoned my blog... just been very busy participating in exhibitions lately. Most of the work I have created recently was intended for these exhibitions so I'm not currently making much furniture to speak of. I like alternating between functional and non-functional work. The non-functional allows me to push the boundaries of my creativity as the work is more free-flowing and not restricted to formal designs. This particular work is primarily wall art as well as sculptural work. I can't decide which of these forms of art I prefer making :) Typically when I have a vision of a particular piece of art I attempt to create it within a short period of time so as not to lose the vision. Of course, I can work from sketches I have drawn but I need to seize the moment sometimes. I'm incorporating more curves in my sculptural work now as these sculptures evolve from my earlier work.