Showing posts with label woodworking videos. Show all posts

Tuesday, November 12, 2019

Kumiko Demo

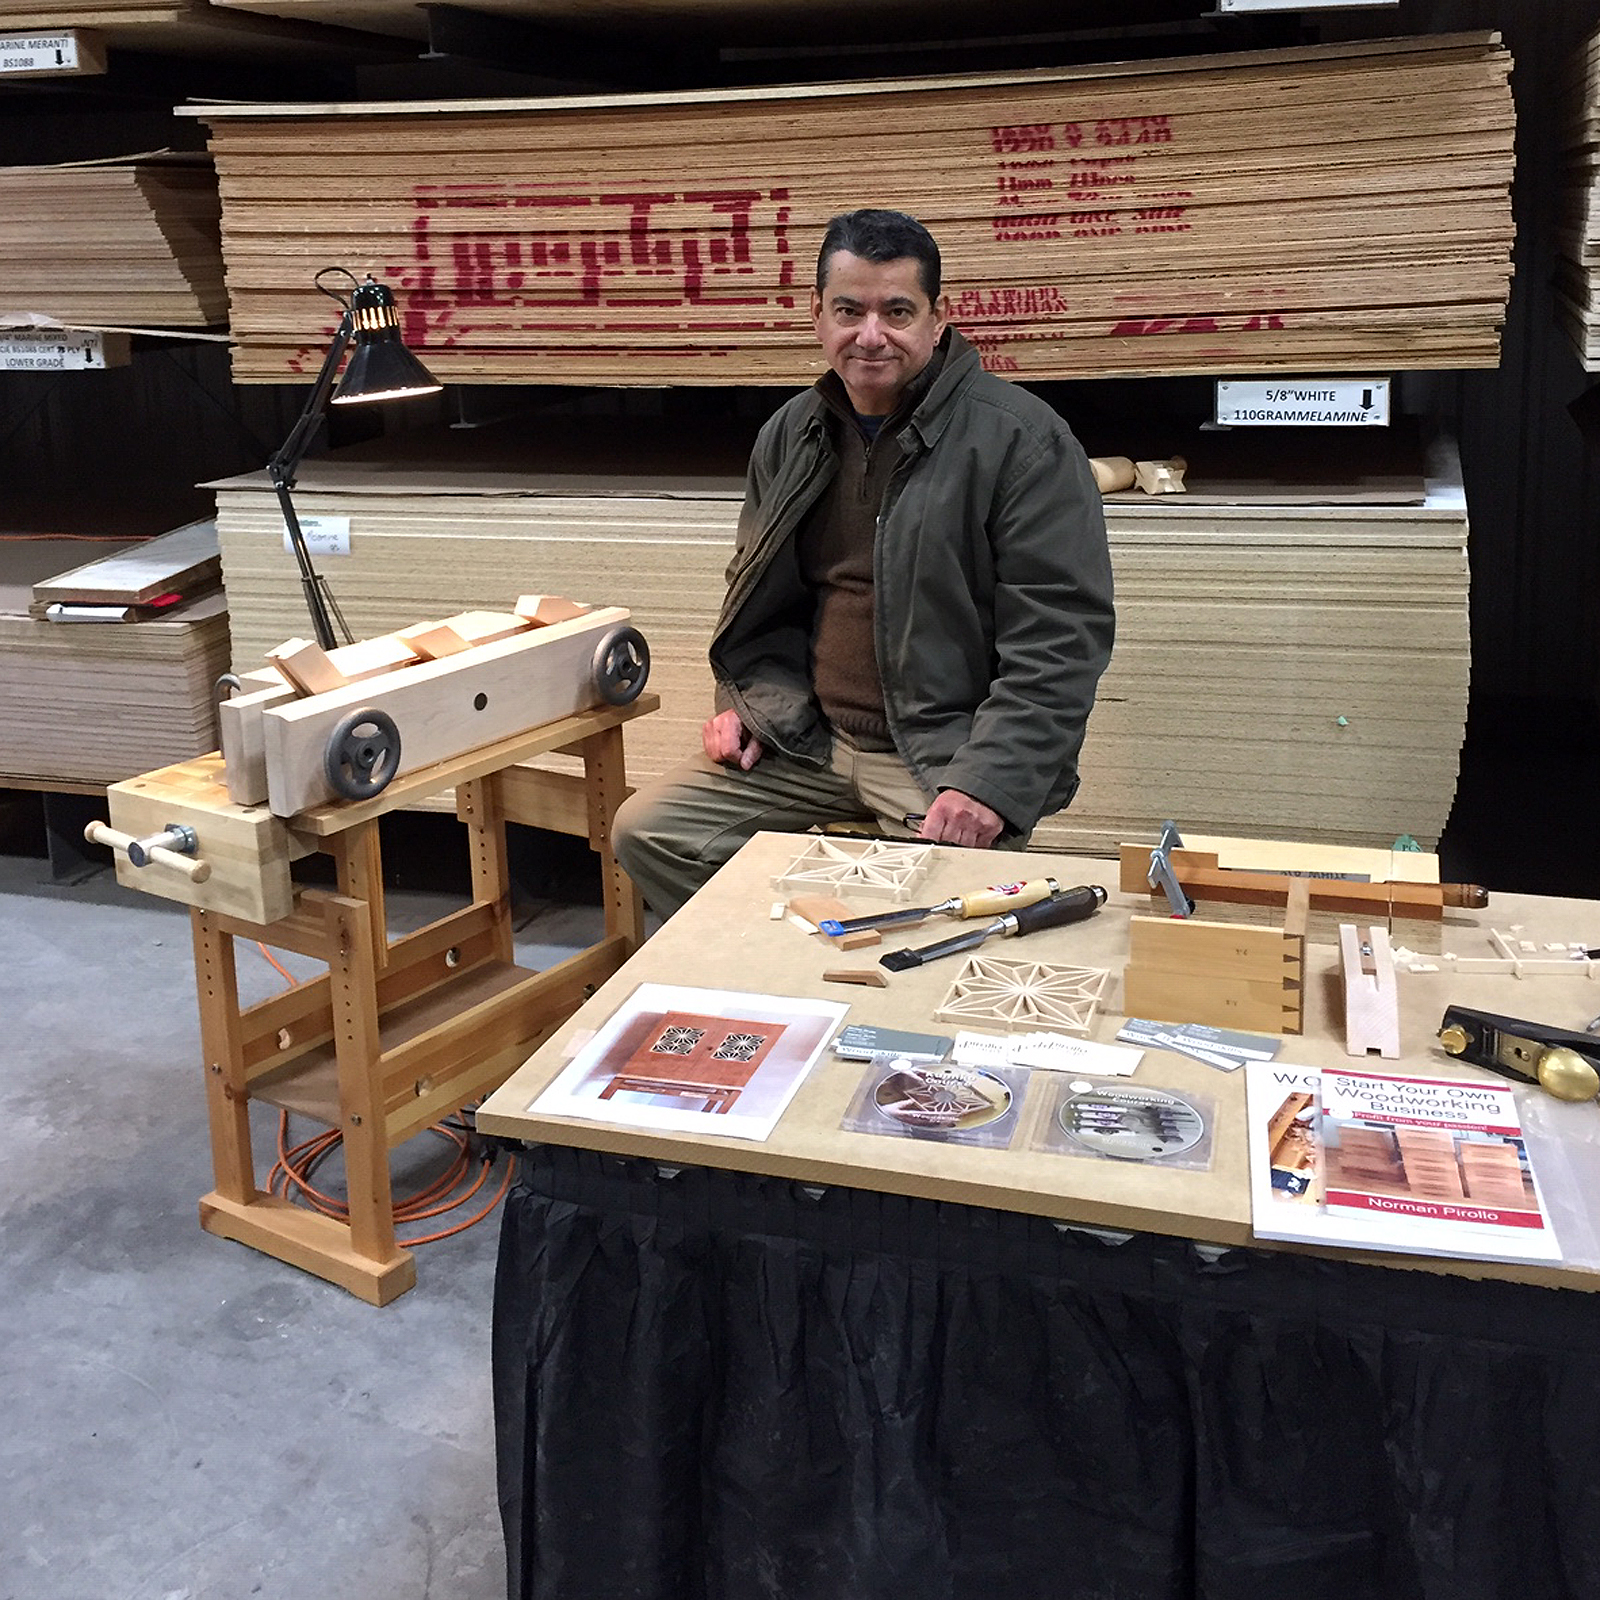
I came across an opportunity to both demonstrate and talk about the traditional Japanese craft of Kumiko at an annual woodworking event. In discussion with a local wood supplier and mill (Wood Source Ottawa, Ont.), they mentioned their upcoming annual open house and how they encouraged local vendors and artisans to participate. I quickly signed up at the opportunity to present and share my passion of Kumiko. Proceeds from the open house silent auction also went to a good cause, so this became another motivation for me to participate. I truly enjoy discussing woodworking and love to engage with people and hopefully motivate them to either start or continue to pursue woodworking.


I had several days to prepare and had sufficient time to create enough Kumiko components to last through the open house. The opportunity also challenged me to devise an innovative way to hold Kumiko guide blocks without having to continually unclamp and clamp the critical guide blocks to a vise. I was able to enlist my Moxon vise along with a small workbench to perform this. The opportunity also provided me the impetus to market a Kumiko Course I had been working on. I could offer the video-based course at the open house! So this all came together and I enjoyed two days at the open house engaging with people and introducing them to the centuries-old traditional Japanese craft of Kumiko.


At first glance, people would be in awe at the small scale of components in Kumiko. Their first reaction was how intimidating and difficult it was to tackle. After engaging and demonstrating the ease of forming and shaping the small interlocking parts, their fears vanished. Often, people need to have a technique presented in a live setting to grasp its intricacies. I get this and can easily relate to this form of learning and visualization. Techniques of safely using a wide chisel to pare wood were also demonstrated, being the core of Kumiko component creation.


I enjoyed the experience and in the process made a few local contacts. Hopefully, I have encouraged a few people to tackle Kumiko and woodworking in general. Working in a solitary studio environment often keeps me from interacting with like-minded people that share a common interest in woodworking. People enjoy sharing their passion and the timing of this open house was ideal since I was between projects and needed a break from my furniture design + making.

Link to  Kumiko Course

Thursday, August 29, 2019

Anti-Kickback System for Tablesaws

A gave myself a nice birthday gift the other day. Filed patent with the USPTO on anti-kickback system for tablesaws, so I can disclose it. A project important to me as I have experienced kickback a few times and made it a mission to fully understand it. Addresses table saw safety and the pervasive problem of dangerous and violent table saw kickback. The AKS system actively mitigates kickback. It can electronically sense 3 common kickback conditions and activate a braking system. The project began 3 years ago but I abandoned it due to its complexity. There were insurmountable technical hurdles that involved considerable more research.

This summer I once again embraced the project and pushed through the technical hurdles. The table saw in the video is a purpose-built prototype for testing of and demonstrating the AKS system. There was a huge learning curve to be able to accomplish this, develop the software to control it all, understand motor control and fabricate the prototype. AKS system can be integrated into any new table saw on the market. Best part is it works and exceeds expectations!!


Saturday, October 14, 2017

Cabinet Build Class

I have recently compiled a series of 16 videos into an online class. The subject was a recent display cabinet build. The design and build of the striking Krenov-inspired display cabinet seen below is discussed and demonstrated. The contemporary styled display cabinet features veneered sides and doors. The veneers selected are highly figured although they can be substituted with alternative veneers. The frame and panel back adheres to the Krenov principle of properly finishing the back of the cabinet. James Krenov is widely known for his classic cabinets on stand as well as the incredible attention to detail he brought to furniture making. He also brought a unique philosophy and vision to furniture making of which I heed and practice. A large part of this veneered display cabinet has been created using an assortment of hand tools although some machinery is used in the initial wood preparation stage. Follow me as I describe the steps involved in creating a masterpiece veneered cabinet on stand.


The following topics are covered in detail in this 16 part design and build class:
  1. Inspiration and design of the display cabinet
  2. An overview discussing components of the cabinet
  3. Wood selection and resawing veneers used in cabinet
  4. The advantages of using veneers over solid wood
  5. Detailed information on creating and using resawn veneers
  6. The process of applying veneers to the sides and doors
  7. Implementing bake-ins to create panels with hardwood edges
  8. Hardwood edging and the veneer press
  9. The veneer press and joinery used in the cabinet
  10. Card scrapers and the use of a shop-made drilling guide
  11. Dowel drilling guide in-depth
  12. The case construction process
  13. Frame and panel construction of the back panel
  14. Back panel detail and installation
  15. Final case assembly of the display cabinet
  16. Installation process of knife hinges for the doors
Each video segment addresses one aspect of the cabinet build. The design process as well as the methodology behind the build are addresses. This is not simply a class on how to build a cabinet on stand. The class will inform you of a similar design process that James Krenov used in his own work. Since I am an ardent follower of James Krenov, the practices I use in this cabinet build closely follow those of James Krenov. Discussions and demonstrations describe how the design of this display cabinet originated and the design considerations in its build. Information on wood selection and preparation as well as the joinery used in this cabinet is covered in detail. Tips and techniques acquired over several years of creating this style of cabinet are shared in this class. The process of creating and applying veneers is covered as well as information on the installation of knife hinges. More info in the Tutorials section of my web site.


Monday, May 29, 2017

Horizontal slot mortiser (update)...

So I just created a 2-part video of the Jessem Mortise Mill mounted on my rolling cart. The two-part video for this can be seen at: https://www.youtube.com/WoodskillsCourses . Tech in wood joinery meets handcrafted design + build. Top is the mortising unit mounted horizontally, below the micro-adjust system. The original story follows as this is an update to an earlier post. The Jessem Mortise Mill unit was purchased a few years back and I created a few loose tenon slots successfully with it. The original mortiser design was to mount it vertically and use a power drill from the top down. Although this worked, I found the drill pressure would push the board down no matter how much clamping pressure I used. So I put the Mortise Mill aside for a few years until recently. During a shop reorg, I found the unit gathering dust and decided to re-incorporate it in my shop. I had always wanted a horizontal slot mortise and thought why not set this up to create slots horizontally instead of vertically. Original instructions were to install it vertically with boards placement underneath. So I decided  instead to mount it so slots were created horizontally as a horizontal slot mortiser. 

Next step was to find a suitable platform, i.e. workbench surface to mount it. A rolling cart in my workshop was ideal since I could wheel the unit away when not in use and the footprint of the Mortise Mill was not large. The rolling cart has large locking casters which do a good job of keeping the cart immobile. Installed it so the surface of the base plate was even with the surface of the cart, this took some time. I used large enough 1/4-20 bolts to maintain rigidity and keep it from shifting. The Jessem mortise Mill requires that a shop-vac be attached to the dust port otherwise the unit begins to clog up with sawdust, this can also be seen in the videos.

Have been using it since and am pleased with the system. The addition of the L-shaped wood bracket to support stiles while being mortised works well. The ends of rails to be mortised are easily supported by the wood surface of the rolling cart. I like the fact that I can permanently leave the Mortise Mill bolted to the rolling cart.

The only small issue was the vertical adjustment of the slots on a board. Since the Mortise Mill was installed horizontally, the adjustment was not as smooth as I would like due to the weight of the sliding carriage of the unit. Notice the etchings on the Mill are upside down. So, using scrap walnut and maple, in comes the micro-adjust setup to solve the problem. It is all wood construction with a 1/2 inch lead screw and wood handle. The end of the lead screw has a custom cradle contoured to fit the bottom edge of the sliding part of the Mortise Mill. I can precisely dial-in slot placements for either offset or different thickness boards now! 


Since the micro-adjust system is cantilevered off the rolling cart, I beefed up the supports, it's probably over-engineered now. Things to watch are the exact placement of the tip of the lead screw over the center of the edge of the Mortise Mill for smooth operation. A large paddle switch for the built-in Mortise Mill dust collection was installed for convenient access.


The two-part video for this can be seen at: https://www.youtube.com/WoodskillsCourses
Completed, tested and have been using for a few months now. Works great!