Showing posts with label hand tools. Show all posts

Wednesday, January 1, 2020

Sliding Tail Vise

Over time and with increased use of hand tools, I enjoy creating jigs and tools to make the experience a better one. As a left-handed woodworker, I struggle with tools that are primarily designed for right-handed use. Regular bench planes are not an issue as they are symmetric in nature. When it comes to joinery and specialized hand planes however, the handedness is a little more critical. I have adapted for the most part but in some cases prefer a left-handed version of a tool as it feels more natural to me. In summary, I need to work on both sides of a workbench to accommodate either a left-handed or right-handed tool.


To overcome this, I developed this interesting workholding jig that plugs into the tail vise, in my case a twin screw vise, and serves to extend the operation of the vise over the workbench surface. Twin screw vises or end vises when used as tail vises, introduce a large gap between the moving jaw and the workbench surface. Another consequence is that the workpiece is hanging over the end of the workbench, not an ideal orientation for working with hand planes. The sliding tail vise emulates a real tail vise in its operation. Racking is also eliminated when clamping narrow boards through the four point system.


The sliding tail vise transfers clamping to the main workbench top. Inherent in its design ,it attaches through four points. Two fixed points in the outer jaw and two sliding points within slots. I can now quickly clamp a workpiece to the workbench surface through a wide bearing surface and if necessary lock it in place through two knurled bolts.


The sliding tail vise is also designed to be portable. I can easily use it on either side of my workbenches depending on the tool being used ( left or right hand orientation). I have also updated the design to work better with plow planes and the depth adjuster on this type of hand plane. This can be seen in the last image. So what began as a project to allow me to use the twin-screw vise to clamp on either side of a workbench, has turned out to be a really versatile clamping aid for an end vise or twin-screw vise regardless if you are left or right-handed.


Instructions and CAD diagrams are now available on how to create this sliding tail vise along with detailed plans. The plans are specific to Veritas workbenches, but easily adaptable to similar workbenches with either an end vise or twin screw vise. Plan available through www.woodskills.com

Tuesday, October 2, 2018

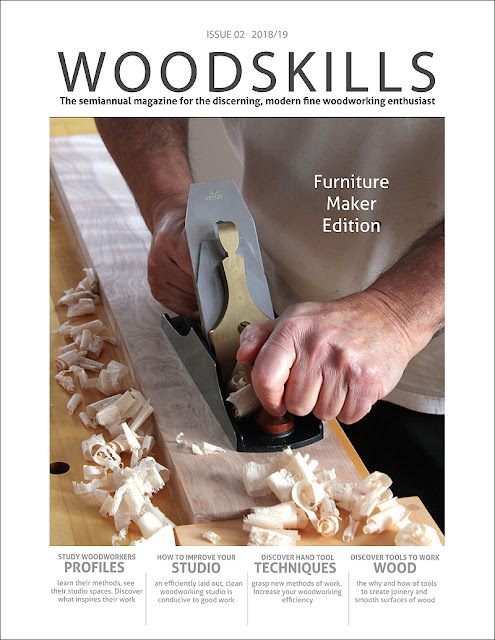
WOODSKILLS Issue 02 - now available!

The idea was hatched a year or so ago. A new magazine catering to the discerning, fine woodworking enthusiast. It was an idea that slowly developed and at one point became a reality. So a small team and I have been working at this and are happy to announce that the latest issue of WOODSKILLS woodworking and furniture making magazine is now available. Some of the features in this Furniture Maker Edition include furniture maker articles, profiles of accomplished furniture makers, best studio practices, contemporary furniture design, gallery, vacuum veneering, Moxon vise build, sharpening + woodworking strategies, wood selection strategies and social media for furniture makers. The terms studio and workshop are used interchangeably throughout the magazine. WOODSKILLS is a semi-annual publication, published twice yearly in late spring and fall.

As a follower and practitioner of James Krenov style of work and methodology, both hand tool and some machine techniques are included. Although the vast majority of articles refer to hand tools, machinery is not excluded. I find this to be a more realistic approach in this day and age. Machines can do the grunt work whereas hand tools are used to create joinery, shape and finesse furniture components, smoothing surfaces, etc. Advertising is at an absolute minimum and consists of curated advertising, a term gleaned from the art world. Advertising must reflect practices and products that our readers and the team at WOODSKILLS could use or include in their own workshops and studios. Available through woodskills.com (digital) or Amazon (print version) or Blurb (premium print version).
 
Furniture Designer + Maker Profiles
Darrell Peart, Craig Thibodeau, Jan Lennon, Brian Greene
Workshop Setups & Best Practices
Furniture Maker Articles
Vacuum Veneering
Furniture Design Gallery
Contemporary Furniture Design
Moxon Vise Build
Sharpening + Woodworking Strategies
Social Media for Furniture Makers

WOODSKILLS Issue 02 woodworking magazine

Instagram: woodskillsmag 
Twitter: WoodSkills
Facebook: WoodSkills 

Thursday, April 5, 2018

WOODSKILLS Issue 01 - new magazine

**Updated with new video of print version of magazine.

The idea was hatched a year or so ago but other projects came first. A new magazine catering to the discerning, fine woodworking enthusiast. It was an idea that slowly developed and at one point became a reality. So a small team and I have been working at this since the month of January and we are happy to announce that the latest woodworking and furniture making magazine WOODSKILLS is now available. Some of the features in the magazine are articles on hand tool use and techniques, profiles of accomplished woodworkers and furniture makers, best studio practices, contemporary furniture design, gallery, tool discussions. The terms studio and workshop are used interchangeably throughout the magazine. WOODSKILLS is a semi-annual publication, published twice yearly in the late spring and late fall.

As a follower and practitioner of James Krenov style of work and methodology, both hand tool and some machine techniques are included. Although the vast majority of articles refer to hand tools, machinery is not excluded. I find this to be a more realistic approach in this day and age. Machines can do the grunt work whereas hand tools are used to create joinery, shape and finesse furniture components, smoothing surfaces, etc. Advertising will be at an absolute minimum and consists of curated advertising, a term gleaned from the art world. Advertising must reflect practices and products that our readers and the team at WOODSKILLS could use or include in their own workshops and studios. Available through woodskills.com or Amazon (print version).
 
Woodworker and Furniture Designer Profiles
Workshop Setups & Best Practices
Hand Tool Techniques
Furniture Design Gallery
Contemporary Furniture Design

WOODSKILLS Issue 01 woodworking magazine

Instagram: woodskillsmag
Twitter: WoodSkills
Facebook: WoodSkills
Web Site: www.woodskills.com

Wednesday, January 10, 2018

Moxon vise build...(Pt. 2)

The Moxon vise build continued and the vise was completed a couple of days after beginning the project. There was a considerable delay in determining the optimum length of the vise. This actually held me back since making it too short is essentially non-correctable later. Too long and there is a weight penalty as these Moxon vises tend to be heavy, especially with the Benchcrafted solid iron handwheels. Although the extra mass and weight can be your friend when clamping boards down, portability of the unit is also a consideration. I would need to determine the size of panels I most often worked with. In my work, I never go over about 20 inches in width so I set this as optimal distance between the screws. Then, using guidelines on screw hole placement provided in the Benchcrafted instructions, a final length of 28 inches was decided on. I did follow the suggested screw hole placement in the Benchcrafted instructions, this saved some time. Next was to mark the 3/4 inch screw holes and begin drilling, careful to have the holes in the front and rear jaws perfectly aligned.

Moxon vise mortise captive nutMortising for the captive nut in the rear jaw inside face was performed using bevel-edge and mortise chisels. Hard maple is well.. hard! In this case, the mortise chisels excelled at hogging out material from the 3/4 inch deep mortise. With a softer hardwood, lighter bevel-edge chisels would have been sufficient. I also oriented the nut so it would align well with the long edges of the rear jaw, mostly an aesthetic consideration. 

Moxon vise captive nut in rear jaw
After test-fitting the Benchcrafted hardware and ensuring it worked smoothly, the next step was to attach a large block of wood to the rear. This block of wood would both stabilize the vise assembly and allow holdfasts to be used to clamp the Moxon vise to the workbench top. Several other intermediate steps were performed, always careful to get alignments exactly correct. There is almost no room for error in making these vises since replacing either of the jaws is both time and material consuming. A more comprehensive article on how I made this Moxon vise will be available at the web site soon.  

A table extension and vertical support was then added after ensuring the stabilizer was effective at clamping down the Moxon vise to the workbench. The table allows me to extend horizontal boards for marking..i.e. dovetails. I customized the design to use an extra row of dog holes in the center area of my workbench. I have two of these workbenches set as my primary workbenches, so the Moxon vise will be completely portable between benches. The vise can also be located almost anywhere on the workbench surface as the holdfast locations are optimized to clamp the stabilizer block of wood at rear of the vise. I am using Gramercy holdfasts but any holdfasts can be set up for use with the vise.


More detail of the handwheel, screw, and captive nut can be seen above. The table is reinforced below both long edges for maximum support, this to allow for any mallet work. i.e. chopping out dovetails. A large design consideration was to not make the Moxon vise too heavy as I would often be removing it from the workbench top and/or moving it between workbenches. The table size was optimized for this vise and the type of work I do. When designing your own Moxon vise, you will need to determine the size of boards and panels you most often work with. The overall length of the Moxon vise is the most important consideration in its design, it is best to get it right the first time!


A more in-depth article on how I made this Moxon vise will be available at the WoodSkills web site soon. 

Thursday, November 2, 2017

The evolution...

Several years ago, 2006 to be exact, Michael Dresdner contacted me to ask about profiling me in an upcoming Woodworker's Journal online publication. Of course, I jumped at the opportunity to talk about my woodworking and how I got to where I was at the time. I was transitioning from primarily being a box maker to furniture making and the reasons for this shift in direction were discussed in the interview.


Jewelry Box Build

In that period, I had completed a series of courses at a high-end furniture making school and began to use hand tools more in my work. I recall that the year 2006 was an important juncture in my woodworking. I had embraced the Krenov philosophy and his methods of work. Reading and attending the fine furniture making school inspired me to increase the complexity and scale of my woodworking. I also learned to slow down my woodworking and focus instead on each and every piece rather than applying myself to creating in batch mode ( multiples). So my direction changed dramatically in the years 2006-2008 to where I now design + build one-off furniture pieces exclusively.

The most important takeaway from the interview would likely be the last line: “If you are tired of your day job,” Pirollo advises, “do what I did. Pursue your passion instead.” To this day, I completely believe in this quote. It is never to early to pursue your passion. Get a head start, so if unforeseen circumstances affect your livelihood (career), you will be prepared.  Early on my hi-tech career, I pursued many woodworking courses at the college level, set up my own workshops and struggled and worked at learning the woodworking trade. After experiencing a total of 3 downsizings, I gave up on my hi-tech career and moved on to a career in woodworking. This had been my Plan B all along 😉 The important part is that I was well prepared to launch a second career. You never know where fate will lead you!

I'll let you read the article.
Norman Pirollo: The Refined Edge of White Mountain


Monday, October 23, 2017

Hand Tool Class

I have recently compiled a series of 24 videos into an online class on hand tools. The class combines videos from two different sources. So a background on hand tools is introduced as well as best practices. Many of the video lessons include step by step hand tool sequences. The Hand Tool Class is derived from twenty years of woodworking and furniture making expertise. I work with both hand and power tools today but really only use power tools for preliminary processing of lumber into wood planks. I consider this grunt work. The carrot at the end of the stick comes later when final dimensioning, joinery and detail work occur strictly using hand tools. I find this to be an effective compromise in my real-life furniture design + build studio.


I also include the Dovetail Jig Plan as well as my Shooting Board Plan ($24) with each purchase. There is so much to grasp with hand tools, especially hand planes. Hopefully, this Hand Tool Class will make it easy for woodworkers (both new and seasoned) to better understand the intricacies of hand tools. The how's and why's of each tool are introduced! The class should provide a good basis and a good foundation to make hand tool processes become a larger part of your woodworking. As time goes on, I am transitioning further in the use of hand tools in my own work. With increased exposure and application, I find that I can simply pick up several of the hand tools and complete a task. Muscle memory kicks in and the tools are kept tuned and sharp. Woodworkers often struggle with hand tools early on unless they are shown how to adjust and tune the tools for optimum performance. The frustration of going through the steep learning curve can easily be circumvented through proper instruction. Once past this hurdle, the tools become a pleasure to use.


More detailed info on what the Hand Tool Class offers along with a short , lo-res video below of a few of the highlights and segments available at:  Hand Tool Class

Wednesday, October 11, 2017

Furniture Design Course

In this new course, I cover the furniture design topic. This is a topic near and dear to me as I believe that good design is essential in a quality furniture piece. Good design also minimizes wasted resources and provides a furniture maker with essential feedback and pause when creating furniture. Loosely translated, the design process keeps the maker from rushing into a potentially flawed furniture design. The checks and balances give pause to the process as well as streamlining the build. Developing your own style and furniture aesthetic is also covered. Selecting the right woods for your furniture design is critical in determining the appeal of the final furniture piece.

As with most woodworkers, I was anxious to build furniture early on. With the passage of time and several furniture projects completed, the anxiety of simply creating work had passed. It was far more important to create a well-designed and striking piece of furniture. So I delved into furniture design, studied with some renown furniture makers, and used this knowledge to establish a furniture design process that works.


Furniture Design Course

In the online furniture design course you will learn the skills necessary to design and create your own unique furniture. Learn to develop your own style of furniture and aesthetic. Over 2 hours in total. Course features videos on these topics:
  1. Furniture design overview, the history of furniture design
  2. Becoming familiar with the furniture design process
  3. Understand design process, bring your furniture designs to next level
  4. How to select wood for a furniture design
  5. Use of mockups and prototypes to develop a furniture design
  6. In-depth use of mockups to develop a furniture design
  7. Determining a furniture style for your own furniture designs
  8. Selecting a furniture style and aesthetic
  9. Developing a furniture design
  10. Getting the proportions right in a furniture design
  11. Using the dynamic design process in a furniture design
  12. Use of maquettes and prototypes in a furniture design
  13. Use of templates and CAD when designing your furniture

Tuesday, July 25, 2017

Bench stops (12th anniversary)...

In 2005, I developed this system of bench stops as a simple alternative to installing a tail vise on a workbench. So I've been using this system of bench stops for 12 years now, it will be the 12th anniversary shortly! The system is set up on one of my original workbenches which happened to be my main workbench at the time. This particular shop-made workbench did not lend itself well to incorporating a tail vise so I told myself there had to be a better way to hold boards firmly while hand planing. Apologies for the vintage photography, but I wanted to keep the article period correct :)

This alternative tail-vise setup is used when face planing boards. Most flat, regular benches can easily be modified to incorporate this hand planing setup using bench stops ( Roubo style). Photos below are of the bench stop setup on the workbench in my workshop. This bench has been modified for adapting the two bench stops. Adapting a bench can be expanded for longer bench stops, more holes for versatility, etc. I chose this particular hole spacing for the type of work I do. I am also left-handed and plane left to right, therefore I set this up on the back side of my bench which is unencumbered by a face vise ( the face vise at front of bench ).

It is critical to get the 3/4 in. dowel holes square to the bench and in-line with each other, to ensure that the 12 in. bench stops are perpendicular to each other. The side bench stop does a great job of preventing the board from rotating sideways while hand planing with diagonal strokes. It has a large bearing surface to keep any size board from rotating. The side bench stop is also movable within a 12 in. span on 3 sets of holes, allowing for narrow boards and wider boards (2 in. to 14 in.).

Handplaning-1

The side bench stop can be swung around towards the front bench stop with a parallel set of holes, this is to accommodate shorter boards. Pictures above and below provide a better explanation.

The wide front bench stop also serves to prevent the board from rotating or shifting sideways as it has a large bearing surface for the front edge of the board. Bench stops (front and side) are friction fit so they can be raised (1/4 in. to 3/4 in.)  to accommodate thicker boards, very much like a bench dog. Otherwise, the minimum height of the bench stops would be approximately 1/4 inch. The hole spacing is arbitrary and based on the type of board sizes I typically hand plane in my own furniture making. two inch long birch dowels are glued in the bench stops using ebony wedges. The wedges are inserted into kerfs created in the ends of the dowels for tightness. Kerfs at the ends of the dowels are cut on a bandsaw.

A benefit of having a board simply against bench stops is that you really cannot drag the plane back in your strokes since it would pull the board back. This trains you to lift the handplane instead of dragging it back. The only wear on the blade then is from the forward stroke. Also you eliminate the tendency of bowing a thinner board caused by clamping between bench dogs and tail-vise and distorting the board while planing. You also gain more tactile feedback and control of your planing and it becomes easy and quick to re-orientate the board end for end or flip it over, etc.

Handplaning-1

Typical bench stop setup to act as a tail vise.

handplaning-2

More holes can be added to allow for very short boards as done in bottom pictures. It is then a matter of swinging the side bench stop around towards the front bench stop. The spacing and location I have selected is optimized for the length and width of boards I typically handplane in my furniture making.

Bench Stops 3

The bored 3/4 in. holes can also be used for bench dogs and holdfasts for irregular sized pieces.


Align side bench stop to be perpendicular with face of front bench stop using a large square to mark holes. This will ensure the complete edge of the bench stop is against the board to be planed.

Planing stops 4

Side bench stop set to narrowest width, closest to edge of bench.

Planing Stop 5

Bench stops can be raised or lowered as conventional bench stops for thinner or thicker boards.

Planing Stop (small board)

A short, narrow piece of lacewood being planed.

Planing Stop 6

Parallel set of holes bored to accommodate shorter and wider boards shown above. It is recommended to lay out all the holes you will need for this system and then drill them. This method ensures that all holes are square and perpendicular to each other and the front bench stop.

Planing Stop 8

A small, wide panel being face-planed.

Developing this alternative tail vise idea led to an article on bench stops and jigs I wrote for Fine Woodworking Magazine. The 4 Bench Jigs for Handplanes article was published in early 2009.

Friday, July 29, 2016

New product, handcrafted bench dogs...

I have been successfully using these hardwood bench dogs in my furniture design+build studio for over 8 years. Why not make them available as a product. For most woodworkers, time is both limited and valuable. I have the setup and expertise to make these. The result is more free time for woodworkers to do what they love.

Hardwood bench dogs are better suited to working with wood than metal ones. This solid hardwood bench dog has a 3/4 inch diameter round profile. The round bench dog is intended for use in workbenches with 3/4 inch round holes. A spring-loaded bullet catch is press fit into the sliding part of the bench dog. This ensures that the bench dog makes a solid fit with the workbench hole.

The length of the bench dog is 3.75 inches which is ideally suited to most workbench thicknesses. To ensure positive clamping of thinner stock, a raked flat notch is recessed on one side of the bench dog. Leather is applied to the face of the raked flat face of the notch to prevent wear on furniture components clamped against the bench dog. The bench dog can easily be lowered into the dog hole when not in use, and raised for use.


The bench dog can be raised to match the thickness of the stock that is being hand-planed, assuming there is a 3/4 inch through-hole in the workbench surface. The hardwood bench dog eliminates the risk of marring the metal sole or blade of a metal-bodied handplane. The hardwood used in the bench dog design is oak.

The price for each handcrafted bench dog is currently $11.50 and available through WoodSkills

Wednesday, January 6, 2016

An Excerpt...

An excerpt from the "From Hi-Tech to Lo-Tech: A Woodworker's Journey" book. This is the period when I experienced doubt about continuing in my current career and making a go at woodworking instead. Or should I say, this is but one period where I experienced this. I would ultimately make three attempts at full-time woodworking and it has worked out for me.


"This course helped me considerably in understanding the finishing process. After leaving the Cabinetmaking program, it was felt I had the necessary knowledge to begin working on my own furniture projects. Through the Cabinetmaking program, I had become intimately familiar with many woodworking machines and learned many techniques. Rough lumber could be processed and dimensioned parts created for furniture. We were taught how to work with cut lists. It was also taught how to profile the edges of boards and how to create joinery, both simple and compound.
The year was 1995 and many thoughts were racing through my mind. The thought of a career in woodworking preoccupied my mind more. I began to read stories about other people that had transitioned from a career into woodworking. At this period in my life, I was young enough to appreciate that there were many years remaining in my computer career. It would not be wise to leave such a career and instead struggle at a woodworking career. This introspection helped me to understand myself and to newly define my goals in life. Of course, the issue of money and supporting myself was at the forefront. The current computer position at DEC compensated me very well and I was able to maintain my house, a car and also outfit my new woodworking shop. Being single at the time, my precarious financial position was clear if I were to lose my employment or quit. This motivated me to continue in my computer career and to advance my knowledge to remain relevant.
Over the next while, I continued to pursue my woodworking hobby in my spare time while working at my day job. My new workshop area continued to be outfitted with additional tools and machinery; careful not to clutter the limited space in the workshop. Having created a few band saw boxes encouraged me to create larger boxes with more traditional joinery. These would be square and rectangular boxes. I had in mind to create a series of small boxes and install music mechanisms in them. The boxes would be straightforward with hinged tops. In the early 1995 timeframe, work began on these small music boxes."
Available through WoodSkills


Friday, June 5, 2015

A Case for Dowels...

My latest book is complete and published, I can get back to woodworking now. Writing, editing, and publishing a book is such an intensive process, it demands total focus.

In many of my cabinet assemblies I use dowels to attach the sides to the top and bottom. The use of dowels gives flexibility to the design of the corner joint. For example, I can offset the side panels away from the edge of the top or bottom and in the process work the protruding edge of the top and bottom into a shaped contour,chamfer, rabbet, etc. The alternative would be to use specific corner joints which need to have the side panel and top or bottom panel intersect right at the very edge. An example of this would be a dovetailed joint, a box joint, or a rabbet and lip edge. If you've ever read up on James Krenov and his work, you will find that he embraces the dowelled corner joint for these very same reasons. This is where I received the inspiration for this type of joint and its virtues.


Creating the dowelled joint involves accurate measurement , but most importantly it involves the little jig you can see in the photo, the dowelling guide. This is a piece of wood with the exact dimensions of the panel I am dowelling, the length and thickness. The dowel holes are marked with arbitrary spacing and the dowel guide holes are bored out on the drill press. I use this dowelling guide to create the dowel holes on both of the mating surfaces, in this case the side panel and the top or bottom panel. There is some skill involved in aligning the dowelling guide to both surfaces since the holes for the dowels need to be perfectly aligned. Marking and orienting the dowelling guide to the correct edges becomes very important and I make many pencil marks in the process. The old adage, "measure twice , cut once" is better written as "measure and mark three times, drill once" for this process.

Saturday, April 11, 2015

Hand Tool Solace...

Interesting facts about using hand tools. Hand tool use usually requires harder physical work than power tools, but they offer a higher degree of skill and concentration in achieving accuracy. Hand tools will always be ensured a place in the workshop due to their compactness and relative economy. In many cases, they provide the quickest solution since they require little or no setup time. Some cabinet making still calls for many operations which machines cannot tackle. The other main advantage to using hand tools is the pure enjoyment derived from them. Hand tools operate in relative quiet, therefore not creating the noisy distractions that power tools can sometimes produce. Hand tools such as chisels and hand planes require sharpening occasionally, which is another skill that needs to be developed.

Hand tools have evolved over the past centuries, and today’s tools are vastly superior in both quality of metal, and manufacturing accuracy. The hand tools of yesteryear remain treasured items though, since there is almost always a story behind a particular tool. Here in my furniture studio I use hand tools as much as possible, due to the benefits of reduced dust and noise levels and the higher degree of fine craftsmanship possible. Most educational programs in woodworking begin by teaching the use and virtues of hand tools. This is done because hand tools are almost essential, and will be needed at some phase of a project. Projects can be built exclusively with hand tools or a combination of hand tools and machine tools.


Edge jointing and flattening a board shown above. It is not often possible to place two pieces of gap-free wood together without using a hand plane on their edges. Wood must be smoothed, squared up, and made to fit, the three main jobs of a hand plane. Although machinery exists to perform these tasks, often highly figured wood surfaces need to be planed by hand to minimize tearout. I use a combination of power and hand tools to prepare board surfaces and edges. For larger boards, I typically dimension the boards using machinery to close to their final dimensions. I then tackle the boards using a series of hand planes. For smaller boards, I just use hand planes to joint and flatten the surfaces as I have more control of the process. So I often seek methods of using hand tools instead of power tools to create the components for my furniture. Why do this when machines are available?  Machines are great for repeatability and production work, but to work the nuances in wood; hand tools rule!