Showing posts with label woodworking jigs. Show all posts

Tuesday, October 2, 2018

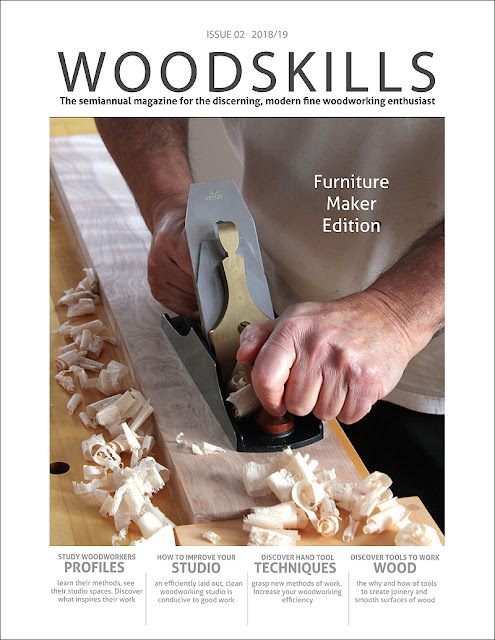
WOODSKILLS Issue 02 - now available!

The idea was hatched a year or so ago. A new magazine catering to the discerning, fine woodworking enthusiast. It was an idea that slowly developed and at one point became a reality. So a small team and I have been working at this and are happy to announce that the latest issue of WOODSKILLS woodworking and furniture making magazine is now available. Some of the features in this Furniture Maker Edition include furniture maker articles, profiles of accomplished furniture makers, best studio practices, contemporary furniture design, gallery, vacuum veneering, Moxon vise build, sharpening + woodworking strategies, wood selection strategies and social media for furniture makers. The terms studio and workshop are used interchangeably throughout the magazine. WOODSKILLS is a semi-annual publication, published twice yearly in late spring and fall.

As a follower and practitioner of James Krenov style of work and methodology, both hand tool and some machine techniques are included. Although the vast majority of articles refer to hand tools, machinery is not excluded. I find this to be a more realistic approach in this day and age. Machines can do the grunt work whereas hand tools are used to create joinery, shape and finesse furniture components, smoothing surfaces, etc. Advertising is at an absolute minimum and consists of curated advertising, a term gleaned from the art world. Advertising must reflect practices and products that our readers and the team at WOODSKILLS could use or include in their own workshops and studios. Available through woodskills.com (digital) or Amazon (print version) or Blurb (premium print version).
 
Furniture Designer + Maker Profiles
Darrell Peart, Craig Thibodeau, Jan Lennon, Brian Greene
Workshop Setups & Best Practices
Furniture Maker Articles
Vacuum Veneering
Furniture Design Gallery
Contemporary Furniture Design
Moxon Vise Build
Sharpening + Woodworking Strategies
Social Media for Furniture Makers

WOODSKILLS Issue 02 woodworking magazine

Instagram: woodskillsmag 
Twitter: WoodSkills
Facebook: WoodSkills 

Thursday, April 5, 2018

WOODSKILLS Issue 01 - new magazine

**Updated with new video of print version of magazine.

The idea was hatched a year or so ago but other projects came first. A new magazine catering to the discerning, fine woodworking enthusiast. It was an idea that slowly developed and at one point became a reality. So a small team and I have been working at this since the month of January and we are happy to announce that the latest woodworking and furniture making magazine WOODSKILLS is now available. Some of the features in the magazine are articles on hand tool use and techniques, profiles of accomplished woodworkers and furniture makers, best studio practices, contemporary furniture design, gallery, tool discussions. The terms studio and workshop are used interchangeably throughout the magazine. WOODSKILLS is a semi-annual publication, published twice yearly in the late spring and late fall.

As a follower and practitioner of James Krenov style of work and methodology, both hand tool and some machine techniques are included. Although the vast majority of articles refer to hand tools, machinery is not excluded. I find this to be a more realistic approach in this day and age. Machines can do the grunt work whereas hand tools are used to create joinery, shape and finesse furniture components, smoothing surfaces, etc. Advertising will be at an absolute minimum and consists of curated advertising, a term gleaned from the art world. Advertising must reflect practices and products that our readers and the team at WOODSKILLS could use or include in their own workshops and studios. Available through woodskills.com or Amazon (print version).
 
Woodworker and Furniture Designer Profiles
Workshop Setups & Best Practices
Hand Tool Techniques
Furniture Design Gallery
Contemporary Furniture Design

WOODSKILLS Issue 01 woodworking magazine

Instagram: woodskillsmag
Twitter: WoodSkills
Facebook: WoodSkills
Web Site: www.woodskills.com

Wednesday, February 7, 2018

Workbench accessories...(Pt. 2)

After completing and successfully testing the portable board jack in the previous post, I decided to continue on with workbench workholding accessories. At this point, two clamping attachments came to mind. The first, an edge dog, alternatively known as a bench puppy, was modelled after a College Of The Redwoods derived design. This particular design was gained from a Timothy Coleman article on this type of workholding device, also derived from a College Of The Redwoods design.


A good example of how an edge dog can be used to hold a board on edge can be seen in the following image. One end is held by a edge dog whereas the other end is an add-on to a twin-screw vise which I discuss next. Instead of clamping a board to the surface of a workbench, the edge dog is used to clamp the board along the workbench edge and therefore at a more reasonable and lower height suitable for handplaning. Having a pair of these edge dogs allows either side of the workbench to be used. The edge dogs are created with opposing configurations as shown above.

My current workbenches do not incorporate dedicated tail vises. In place, I use a Veritas Twin-screw vise which performs as a tail vise when clamping boards on their face. When it comes to clamping boards on edge, the twin-screw vise can also be used along with bench dogs. The edge of the work piece would be then sitting on the workbench top. However, this raises the height of the board considerably and is not very conducive to jointing an edge of a board or handplaning. Ideally, the edge of a board should be slightly higher than the workbench surface to effectively perform hand plane operations. With this in mind, I created this outboard add-on to the twin-screw vise which extends the width of the vise movable jaw past the edge of the workbench.


Shown above, this newly designed outboard add-on accessory is an addition to the twin-screw movable jaw. In effect, the twin screw vise now becomes an enhanced tail vise capable of clamping boards on edge along the side of a workbench. The clamping is done in conjunction with the previously mentioned edge dog. Images of a board being clamped between these two accessories are shown below.


In these photos I am jointing the edge of a white ash board. I was surprised at how tightly the board is clamped with minimal tension applied to the twin screw vise. The friction from the leather pads contribute to this as slightly more tension was necessary before applying the leather pads. The outboard extension to the twin-screw vise is removable and can be adapted to either side of the twin-screw vise. I am left-handed so having it located to the right of the vise as shown, is more practical. For right-handed use, the opposite edge of the workbench would be used for jointing. As an added bonus, there is no racking of the twin-screw vise regardless of the clamping pressure I apply to the outboard extension.


Monday, October 23, 2017

Hand Tool Class

I have recently compiled a series of 24 videos into an online class on hand tools. The class combines videos from two different sources. So a background on hand tools is introduced as well as best practices. Many of the video lessons include step by step hand tool sequences. The Hand Tool Class is derived from twenty years of woodworking and furniture making expertise. I work with both hand and power tools today but really only use power tools for preliminary processing of lumber into wood planks. I consider this grunt work. The carrot at the end of the stick comes later when final dimensioning, joinery and detail work occur strictly using hand tools. I find this to be an effective compromise in my real-life furniture design + build studio.


I also include the Dovetail Jig Plan as well as my Shooting Board Plan ($24) with each purchase. There is so much to grasp with hand tools, especially hand planes. Hopefully, this Hand Tool Class will make it easy for woodworkers (both new and seasoned) to better understand the intricacies of hand tools. The how's and why's of each tool are introduced! The class should provide a good basis and a good foundation to make hand tool processes become a larger part of your woodworking. As time goes on, I am transitioning further in the use of hand tools in my own work. With increased exposure and application, I find that I can simply pick up several of the hand tools and complete a task. Muscle memory kicks in and the tools are kept tuned and sharp. Woodworkers often struggle with hand tools early on unless they are shown how to adjust and tune the tools for optimum performance. The frustration of going through the steep learning curve can easily be circumvented through proper instruction. Once past this hurdle, the tools become a pleasure to use.


More detailed info on what the Hand Tool Class offers along with a short , lo-res video below of a few of the highlights and segments available at:  Hand Tool Class

Tuesday, July 25, 2017

Bench stops (12th anniversary)...

In 2005, I developed this system of bench stops as a simple alternative to installing a tail vise on a workbench. So I've been using this system of bench stops for 12 years now, it will be the 12th anniversary shortly! The system is set up on one of my original workbenches which happened to be my main workbench at the time. This particular shop-made workbench did not lend itself well to incorporating a tail vise so I told myself there had to be a better way to hold boards firmly while hand planing. Apologies for the vintage photography, but I wanted to keep the article period correct :)

This alternative tail-vise setup is used when face planing boards. Most flat, regular benches can easily be modified to incorporate this hand planing setup using bench stops ( Roubo style). Photos below are of the bench stop setup on the workbench in my workshop. This bench has been modified for adapting the two bench stops. Adapting a bench can be expanded for longer bench stops, more holes for versatility, etc. I chose this particular hole spacing for the type of work I do. I am also left-handed and plane left to right, therefore I set this up on the back side of my bench which is unencumbered by a face vise ( the face vise at front of bench ).

It is critical to get the 3/4 in. dowel holes square to the bench and in-line with each other, to ensure that the 12 in. bench stops are perpendicular to each other. The side bench stop does a great job of preventing the board from rotating sideways while hand planing with diagonal strokes. It has a large bearing surface to keep any size board from rotating. The side bench stop is also movable within a 12 in. span on 3 sets of holes, allowing for narrow boards and wider boards (2 in. to 14 in.).

Handplaning-1

The side bench stop can be swung around towards the front bench stop with a parallel set of holes, this is to accommodate shorter boards. Pictures above and below provide a better explanation.

The wide front bench stop also serves to prevent the board from rotating or shifting sideways as it has a large bearing surface for the front edge of the board. Bench stops (front and side) are friction fit so they can be raised (1/4 in. to 3/4 in.)  to accommodate thicker boards, very much like a bench dog. Otherwise, the minimum height of the bench stops would be approximately 1/4 inch. The hole spacing is arbitrary and based on the type of board sizes I typically hand plane in my own furniture making. two inch long birch dowels are glued in the bench stops using ebony wedges. The wedges are inserted into kerfs created in the ends of the dowels for tightness. Kerfs at the ends of the dowels are cut on a bandsaw.

A benefit of having a board simply against bench stops is that you really cannot drag the plane back in your strokes since it would pull the board back. This trains you to lift the handplane instead of dragging it back. The only wear on the blade then is from the forward stroke. Also you eliminate the tendency of bowing a thinner board caused by clamping between bench dogs and tail-vise and distorting the board while planing. You also gain more tactile feedback and control of your planing and it becomes easy and quick to re-orientate the board end for end or flip it over, etc.

Handplaning-1

Typical bench stop setup to act as a tail vise.

handplaning-2

More holes can be added to allow for very short boards as done in bottom pictures. It is then a matter of swinging the side bench stop around towards the front bench stop. The spacing and location I have selected is optimized for the length and width of boards I typically handplane in my furniture making.

Bench Stops 3

The bored 3/4 in. holes can also be used for bench dogs and holdfasts for irregular sized pieces.


Align side bench stop to be perpendicular with face of front bench stop using a large square to mark holes. This will ensure the complete edge of the bench stop is against the board to be planed.

Planing stops 4

Side bench stop set to narrowest width, closest to edge of bench.

Planing Stop 5

Bench stops can be raised or lowered as conventional bench stops for thinner or thicker boards.

Planing Stop (small board)

A short, narrow piece of lacewood being planed.

Planing Stop 6

Parallel set of holes bored to accommodate shorter and wider boards shown above. It is recommended to lay out all the holes you will need for this system and then drill them. This method ensures that all holes are square and perpendicular to each other and the front bench stop.

Planing Stop 8

A small, wide panel being face-planed.

Developing this alternative tail vise idea led to an article on bench stops and jigs I wrote for Fine Woodworking Magazine. The 4 Bench Jigs for Handplanes article was published in early 2009.

Friday, July 29, 2016

New product, handcrafted bench dogs...

I have been successfully using these hardwood bench dogs in my furniture design+build studio for over 8 years. Why not make them available as a product. For most woodworkers, time is both limited and valuable. I have the setup and expertise to make these. The result is more free time for woodworkers to do what they love.

Hardwood bench dogs are better suited to working with wood than metal ones. This solid hardwood bench dog has a 3/4 inch diameter round profile. The round bench dog is intended for use in workbenches with 3/4 inch round holes. A spring-loaded bullet catch is press fit into the sliding part of the bench dog. This ensures that the bench dog makes a solid fit with the workbench hole.

The length of the bench dog is 3.75 inches which is ideally suited to most workbench thicknesses. To ensure positive clamping of thinner stock, a raked flat notch is recessed on one side of the bench dog. Leather is applied to the face of the raked flat face of the notch to prevent wear on furniture components clamped against the bench dog. The bench dog can easily be lowered into the dog hole when not in use, and raised for use.


The bench dog can be raised to match the thickness of the stock that is being hand-planed, assuming there is a 3/4 inch through-hole in the workbench surface. The hardwood bench dog eliminates the risk of marring the metal sole or blade of a metal-bodied handplane. The hardwood used in the bench dog design is oak.

The price for each handcrafted bench dog is currently $11.50 and available through WoodSkills