 After a few days delay I continued the shaping process for the pulls and fitted them to each of the drawers as well as the right-hand door of the cabinet. To maintain consistency and harmony I oriented the pulls in the same way, with the lighter color at the right of the drawers. Locating the pull mortises is an important step since the pulls need to be located similarly on the drawer fronts or it would be kind of obvious something maybe went wrong. At least this is my thinking. I carefully marked the mortises and checked their locations with the drawers in their respective drawer compartments. The pulls fit into the mortises with a snug fit as this is my goal.
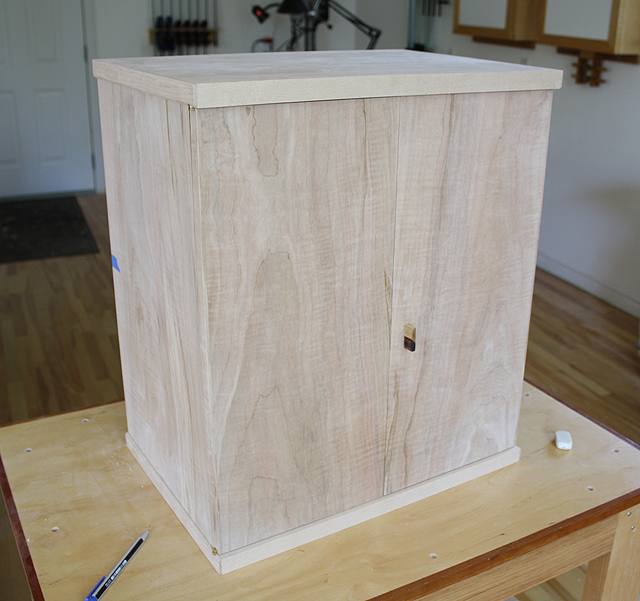
 Afterwards, I fitted the remaining pull to the right-hand door of the cabinet. To get away from absolute symmetry and to make more of the door graphics visible when looking down, I located the door pull slightly lower than center. After installing this door pull, I feel I have succeeded in this effect. A single door pull confirms that it is the right-hand door that needs to be opened first, as the door lip orientation demands this. Having a single door pull also creates a cleaner cabinet front and evokes uniqueness, mystery and a non-conforming design, since the large majority of cabinets in existence have two pulls. Next, I continue scraping the interior to a point where I can begin applying finish. As well, I need to create an edge treatment at the front of the tops and bottom of the cabinet. I had purposely left this until now in case I needed to perform any trimming of the front of the top and bottom. The edge treatment will be a small chamfer which is continuous with the sides of the cabinet. Any trimming is better determined with the doors in place.

 After a few days delay I continued the shaping process for the pulls and fitted them to each of the drawers as well as the right-hand door of the cabinet. To maintain consistency and harmony I oriented the pulls in the same way, with the lighter color at the right of the drawers. Locating the pull mortises is an important step since the pulls need to be located similarly on the drawer fronts or it would be kind of obvious something maybe went wrong. At least this is my thinking. I carefully marked the mortises and checked their locations with the drawers in their respective drawer compartments. The pulls fit into the mortises with a snug fit as this is my goal.
 Afterwards, I fitted the remaining pull to the right-hand door of the cabinet. To get away from absolute symmetry and to make more of the door graphics visible when looking down, I located the door pull slightly lower than center. After installing this door pull, I feel I have succeeded in this effect. A single door pull confirms that it is the right-hand door that needs to be opened first, as the door lip orientation demands this. Having a single door pull also creates a cleaner cabinet front and evokes uniqueness, mystery and a non-conforming design, since the large majority of cabinets in existence have two pulls. Next, I continue scraping the interior to a point where I can begin applying finish. As well, I need to create an edge treatment at the front of the tops and bottom of the cabinet. I had purposely left this until now in case I needed to perform any trimming of the front of the top and bottom. The edge treatment will be a small chamfer which is continuous with the sides of the cabinet. Any trimming is better determined with the doors in place.