Tuesday, December 2, 2008

Recent exhibition...

A while ago I mentioned I was working on two pieces for both an local exhibition and a gallery. The exhibition piece is at the left and I had it displayed this past weekend. A little about it... Solid quartersawn cherry cabinet and dovetailed cherry drawer fronts. I have a subtle hint of lighter sapwood which meanders through where the cabinet doors meet. The pulls are carved cocobolo with contrasting colors, designed with the lighter maple stand in mind. The back panel is solid maple set in a cherry frame also selected to merge the stand with the cherry cabinet. I had something small in mind, and decided on the proportions of this cabinet to fulfill this requirement.

It was a truly enjoyable experience to design and create this and to slowly watch it evolving into a cabinet. The quartersawn cherry was somewhat of a challenge to handplane and I used a scraper extensively in the final stages of preparation of the components. There is a lot to be said for smaller work with smaller proportions, the focus can be more on selection of woods and detail. This cabinet is the smallest I have created so far. Having completed it I moved on to the stand. I wanted a contrasting wood in the stand with a somewhat interesting design yet maintaining structural integrity. In designing the stand I needed to take a criteria into consideration, namely the short depth of the cabinet above.

This short dimension introduced the issue of stability of the stand and cabinet. To compensate for this I have the stand slightly deeper than the cabinet above, but not by much. This is accomplished with the legs slightly proud of the cabinet at the front and back. To work this in, I decided on somewhat of a floating cabinet attachment to the stand, they appear to be separate from each other. To further increase the stability from front to back, I designed bird's feet into the stand to extend the depth of the stand just enough to make it fairly stable without an overwhelming appearance.

The diamond inlay in the front rail of the stand was an added touch to meld the color of the cabinet to the maple stand below in the most understated sense.

I thought I would share this design...

If interested, you can either select the image above for a larger view... a view of the interior of this cabinet and dimensions can be seen at http://www.refinededge.com/

Wednesday, November 26, 2008

Drawer pulls...

I resumed work on the beech cabinet this week. I thought I would begin with something small, as in drawer pulls. Actually the pulls are for the drawers and for the cabinet doors. I haven't decided on the final pull color or style and instead am going to make a sample of two pulls in different woods. These pulls will be similarly sized with a protruding four-shoulder tenon at the back and they will fit into a appropriately sized rectangular mortise. It's easy enough for me to accomplish this, to create two similar drawer pulls and this will allow me to consider the aesthetics of each pull sample on the cabinet.

I needed to do this because it was a toss-up between a blackwood pull and a cocobolo pull. Both might work equally well but I'm concerned of the amount of contrast between the pulls and the beech, should I have very contrasting colors or more of a subtle contrast. Having said this, I'm leaning towards the blackwood at the moment. A light tan background with a black pull works aesthetically in my opinion.

In the photo I have prepared a rectangular pull and am shaping the back square. This particular pull is rectangular, but I have the other option of a more sculpted, rounded pull. I'm not sure at this point, so I'll begin with this. I could have mocked up a small block of wood and darkened it black to be able to do this testing, but not too much more work is actually involved in making the blackwood pull, so I decided to do this instead. You can see the large block of blackwood in the background from which I have resawn and cut the small blank.

Thursday, November 6, 2008

Off duty...

What does a furniture maker do in his spare time except spending even more time in the shop? Sometimes it's good to get away from the woodworking environment altogether and just do something completely different. In my case I like to get back to nature and do some hiking or kayaking in summer, skiing in winter, or anything outdoors for that matter. This past week my wife and I were away in the mountains for a few days of just this, getting away from everything, clearing our minds, and regaining focus. I have to admit, it's very hard for me to pull myself away from my studio and from my love of making furniture, but in the end I'm always glad I got away. Shifting focus is a good thing and often puts things into perspective.

We often head to an area two hours or so away, in the mountains, which prides itself on a very outdoor way of life. The surrounding towns and villages offer great craft and art type shops which open up the mind to new design possibilities. Something both my wife and I love to see is other crafts people's work, regardless of the media. We both have a soft spot for crafts and craftspeople in general and their typically modest, rewarding and fulfilling lifestyles.

While visiting some small shops, I found this beautiful small irregular shaped bowl, handmade in Central America. An ideal small piece to complement one of my small cabinets. The workmanship that went into this decorative bowl is amazing and I had to have it. I already have it placed in one of my cabinets.

I also had the opportunity to read parts of a good book, it is furniture related, but nonetheless I had the free time to be able to sit down and focus on this book, which I've sort of read before, but never really in depth. I find I need to set aside an hour or so every day to be able to catch up on my reading, usually much later in the evening at home. This doesn't always work out, and I begin to accumulate partially read books, etc. I'm a book hound and have shelves full of interesting books that I've read, but also a few small piles of books in the process of being read.. I still hope to address this dilemna somehow, maybe I'll just pack a pile of books into a bag and get away for a few days to do just this.

Monday, November 3, 2008

Drawers installed...

I now have the three drawers fitted and installed into their respective compartments, masking tape serving as temporary pulls :) The partial vertical divider I referred to earlier is also installed with the correct grain orientation which follows every other part of the drawer compartments. I like the idea of the divider as it separates the two halves of the interior. I have designed the drawer compartments to be accessible with one door open, so this makes more sense now. The transfer of light between the left and right areas is also a consideration, at least to me. I don't want to compartmentalize the individual areas above the drawers. Next, I need to decide on drawer pulls, I'll probably go with dual pulls per drawer to avoid any racking issues since the drawers are fairly wide.

And of course, what to do with the opening below the left hand drawer. I have a few options, okay maybe three options. Either it will be a hidden compartment, or a larger, deeper drawer for larger objects. The third option would be to simply leave it open and accessible. In any case, I'm excited about this since it opens up design possibilities to me. I might even apply some inlay to the facade if it is a hidden compartment. I will mull over this for a while while I move to another project I need to work on. and come back to this in a few days. My wife and I are also on a great three day hiking and outdoor vacation as we speak, up in the mountains. Time to clear the mind and get the thought processes recharged, something I like to do periodically.

Saturday, November 1, 2008

Drawer completion...

The three drawers are fairly complete now. There is some back and forth between my bench and the cabinet to test fit each of the drawers and tune them to their respective openings, almost like a ballet. Everything went smoothly with relatively minor tuning and fitting. I don't have the drawers too tight in their opening to allow for seasonal changes in movement of the wood. I had the drawer fronts just a tad proud of the opening and dialed them in just so.

I normally don't attach the back of the cabinet until the later stages of completion, but it's been such a long time with this particular cabinet, I guess I did permanently attach the back panel months ago. The small problem this introduces is that I cannot fit the drawers in completely for there is no way to get them out again without a pull on the drawer fronts. Fortunately, the fit was so good that a strip of masking tape is all I needed to pull the drawers out from their fully closed positions.

There is considerable hand tool work involved in fitting the drawers, but relatively no dust is generated, just fine shavings. I also prepared the bottoms for the drawers by rabbeting a solid wood panel on three sides. The rabbeted portion fits into the groove on the drawer front and sides. The drawer bottoms are easily removed for any reason which might come up. I also loosely attach the drawer bottom to the back of the drawer to allow for some wood movement between seasons. In the photo, the lipped drawer in the foreground has the bottom partially installed with rabbets and grooves visible. Next I make the final test fitting of the drawers and install the cabinet interior divider I prepared in the meantime.

Friday, October 31, 2008

Drawer fitting...

The work of assembling and fitting the individual drawers into the drawer openings has begun. I work on one drawer at a time, assembling and fitting the back and bottom of the drawer. I also purposely leave the back a bit proud in order to tune the length of the drawer so that the drawer front is flush with the opening. The sides of each of the drawers are slightly proud also, just enough to be able to smooth the sides down uniformly with the drawer front. I find it important to orient the grain direction of the sides so that the grain is inwards from the front, this helps the handplaning part greatly. Also, these ever so slightly oversized measurements greatly reduce the chance for error in fitting and it all works out in the end.

I have also installed the rabbeted backs and pinned them to the sides, greatly enhancing the strength of the joint. The bottoms are custom fit to each drawer although most of the drawer bottom measurements are almost identical. I have oriented the grain of the drawer bottoms from front to back, this will allow for expansion and contraction of the bottom, or wood movement.

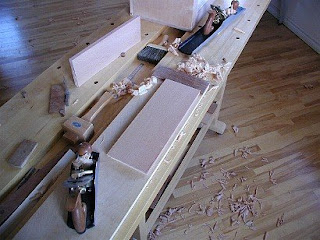
In the photo, the drawer at the front is the lipped drawer. I have left this one for last as fitting it involves an extra step of tuning the drawer front for a perfect fit with the lower drawer of the right hand drawer compartment. Most of my handplaning is done over at my bench at the other end of the shop and all of my dovetail work on this bench, I think it has mostly to do with the height of the benches, this lower one is more conducive to dovetailing, at least for me..

Wednesday, October 29, 2008

Drawer joinery...

Over the past day, I have been creating the joinery for the cabinet drawers. The joinery at the front is half-blind or lapped dovetails, whereas the back of the drawers is assembled with pinned rabbets. In the photo I have created grooves for the bottom in one drawer. The location of the groove is situated over a tail so as not to cut into the corresponding pin of the drawer front. A little trial and error measurement is necessary here, but it all works out in the end. The drawer sides have been purposely left a bit longer than necessary to be trimmed later and fitted with the drawer back. I will continue to work on the other drawer components and leave the lipped drawer last, as the measurements and offsets on this particular drawer are differently located. I like to plan ahead when creating dovetail joinery and mark all the components extensively, including the board orientation and reference faces and edges. It is very easy to get confused otherwise, not that it's ever happened to me :)

After completing the drawer shells tomorrow, I will make the drawer bottoms consisting of edge glued hardwood planed down to a fraction of an inch, to easily fit the drawer grooves. I should have everything including drawer bottoms, assembled and glued later tomorrow. There is some tuning and fitting involved for each drawer both at the sides and front to back. The drawer pulls come next and I'm currently giving this thought.

The combination of beech cabinet and sapele drawers actually work out very well, there is contrast but not overwhelmingly so, more on the subtle side. My other choice was to use cherry for the drawer fronts, but I have been using this extensively lately and wanted something different.

Tuesday, October 28, 2008

Drawer fronts...

I've been busy gathering the right wood for the drawer fronts, sides and bottoms. Drawer fronts will be Sapele, a fine-grained wood in the mahogany family. As part of the drawer front fitting, I cut the fronts oversize in thickness, width and length and then proceed to shoot the ends so they fit the drawer opening just right. I follow the same process with the width of the drawer front, handplaning and tuning it down to size. Prior to this, I had planed the thickness of the drawer fronts to fit the opening. The drawer front of the upper right hand set will overhang the divider providing a seamless look, I designed the divider to be shorter than the drawer opening by the thickness of a drawer front. Next, I begin dovetailing the drawer sides into the fronts and then create the grooves for the drawer bottom, in this order. Important to position the groove correctly over a tail so the groove doesn't exit through a pin in the drawer front. This would preclude using a stopped rabbet instead of a through rabbet.

I'm glad to have completed the stand as the cabinet has been occupying a cool rolling cart I built a few months ago. I now have access to my rolling cart once again, which by the way I'm kicking myself for not having made earlier. These things are great in the shop, allowing me to wheel components around to different benches and assembly tables, etc. Also, I haven't decided on the drawer pulls just yet, preferring to wait a few more days and examine some options in the meantime.

I'm also going to install a short divider between the sets of drawers creating more of a delineation between the left and right sides of the cabinet interior. The area above each of the drawer compartments is to be used to display an art object , the divider perhaps will separate the styles of art objects? It just feels right.

I'm still not sure how to work the area below the left hand drawer compartment into the mix. The design of this has been up in the air for a while, and I'm thinking once the drawers are in along with the divider it will make more sense and a a spark of imagination will occur, an "aha" moment. I'm leaning towards a hidden compartment at the moment. Or I might leave it open, in the spirit of "dynamic design", a philosophy I coined a few months ago.

Friday, October 24, 2008

Cabinet stand...

I assembled the stand and am test fitting it in the photo a few hours after glue up. It fits well and is in very good alignment with the cabinet. This is a concern otherwise the stand looks more like an afterthought than designed with the cabinet if it doesn't fit right. The twin stretchers at the bottom work out well and introduce a small focal point into the design. It is quite a small feat getting the rails and stretchers in position for the glue up and a good point to stop and plan this out well. I assembled the sides initially, then put everything together with the front and rear rails and stretchers. The upper and lower rails are mortised into the legs with single tenons, whereas the twin stretchers are dowelled into the bottom side rails.

I am quite pleased at the aesthetics of the piece and the harmony between the cabinet and stand. I needed to spend some time at the edge treatment phase of all the stand components. The edges of each component are slightly chamfered with a small hand plane, then the edge transition is touched with a very fine sanding block to knock out any sharp edges. Since this is all done by hand, I find myself counting the exact number of strokes with the hand plane, in this case two. It is recommended that all the components be completed in one pass to avoid confusion. In other cases, where multiple passes are necessary, counting the handplane strokes is a good technique.

The stand is also beech and all the front and side facing components have non-descript grain pattern, straight grain for the most part, to not introduce any crazy graphics which take away from the main focal point, the cabinet.


I'm kind of anxious at this point to complete the interior of the cabinet, create the drawers and a small partition, then the pulls, so I can begin to apply finish. I'm curious to see how the figure of the door panels comes out. Of course, I can always wet the surfaces with naptha to temporarily see the figure pop, but I can wait a few more days.


I had a little deliberation deciding on the final height of the cabinet and settled for a 55 inch height , along with a second opinion from my better half. Having the piece too low and it begins to look like a credenza , too high and the stand begins to look spindly. I also wanted to provide an opportunity to see the cabinet as a whole, including a partial view of the top. Accessibility and visibility of the cabinet interior is also important as this is somewhat of a showcase cabinet, and my wife and I did take this into consideration.

Tuesday, October 21, 2008

Cabinet stand...cont'd

I have resumed work on the beech cabinet in the past few days. I've rethought the design of the cabinet stand and made some changes. The original design called for four upper rails mortised into the legs. I would need to have wider front, rear and side apron rails to maintain the strength and integrity of the stand. Rather than this, I have decided on narrower top apron rails and move some support to the bottom of the stand in the form of stretchers instead. The aesthetics of this are more pleasing to me, very much like dividing the load at the top and bottom of the cabinet stand.

The leg dimensions remain the same, instead I divide the original upper rails into two components per rail and use the narrower component at the bottom of the stand. The strength and integrity of the cabinet stand should be maintained with this design along with more pleasing aesthetics, and more subtle, smaller components. I should have the stand assembled within the next day or two. In the meantime, I need to replace one of the components in the stand, a front top rail. In the handplaning effort I was a bit overzealous with this particular rail and the dimensions are no longer right, a little too thin. Rather than handplane the other rails to this dimension, I would rather replace this rail instead.

With significant hand planing, it becomes more important to maintain keen edges on the plane irons. The dullness of the irons sneaks up on you, and before you know it the handplane is struggling to produce fine shavings. I stop occasionally to sharpen the plane irons, otherwise the temptation is to increase the depth of cut with dull irons and all of a sudden they grab and tearout follows.

It's amazing how much the weather has changed in the span of two to three weeks in these parts. It was early fall weather a few days ago, now I hear some wet snow is arriving overnight. It should be nothing significant and late fall will resume, I hope.

Thursday, October 16, 2008

Off on a tangent...

I had some spare time recently while waiting for finish to dry and thought I would experiment with some inlay techniques. I have always found a piece of inlay with a surrounding border to be fascinating to be able to make. I need to confess, I've done this before although quite a while ago and need the practice. What I had in mind is a fair sized yellowheart diamond with a black border, I used blackwood. I have the inlay set in a lighter wood, nothing special, just a small offcut. The process of creating and inserting the inlay is a very good test of patience and fine hand tool skills , for almost everything here is accomplished with hand tools.

The border itself is bandsawn from a larger piece of blackwood and the yellowheart also bandsawn from a solid block. The yellowheart inlay is first drawn out and cut with careful attention to the shape of the diamond, each of the sides and facets needs to be a mirror image of the other side. I then mark the inlay onto the lighter background wood with an allowance or margin for the surrounding border. Once marked with a fine knife, I then remove or carve out the recess for both the diamond and border. Next step is to fit both the yellowheart inlay and blackwood border into the recess with glue , make sure it is well seated and wait for everything to set. Afterwards, I judiciously handplane the inlay and the result is in the photo at top. I find it great therapy to go off and do some other type of woodworking during or after some intensive furniture making, it clears the mind and the instant results can be very gratifying, the practice also keeps the skill retention up...

Saturday, September 27, 2008

Back panels...

Much of my cabinet design and build process involves the creation of a cabinet back. Conventional wisdom says the back of a cabinet is not nearly as important as the front or sides, so it merely needs a panel which is rabbeted into the sides, top and bottom. The problem with this thinking is that it assumes the back of the cabinet will be placed against a surface or wall and never seen. This doesn't apply to all cabinets as many cabinets are designed as showcases which are away from walls, sometimes placed in the center of a room or even a foot or two away from a wall. Something also feels wrong about diminishing the importance of the back of a cabinet when so much emphasis is placed on the design and structure of the front and sides of the cabinet. With this in mind, the need for a more aesthetically nice cabinet back becomes important, along with the function that it introduces to the cabinet. An example of function is if the cabinet is a wall-mounted cabinet and needs a structurally strong back.

The resulting back panel which best meets the criteria of both aesthetics and function is the frame and panel back; a panel inset into a surrounding frame composed of rails and stiles. The frame and panel back is inset into the cabinet back much like a panel would be and in the process the frame and panel also provide some rigidity to the cabinet. In those situations where a single panel is too wide, a middle stile is installed to divide the frame into two halves, otherwise for smaller cabinets a single panel is sufficient. The panel itself can either complement or contrast the cabinet, providing an interesting focal point once the doors of the cabinet are opened, as well as drawing the eye to the pleasing back of the cabinet.

Sunday, September 21, 2008

Dowelling technique...

In many of my cabinet assemblies I use dowels to attach the sides to the top and bottom. The use of dowels gives flexibility to the design of the corner joint. For example, I can offset the side panels away from the edge of the top or bottom and in the process work the protruding edge of the top and bottom into a shaped contour, chamfer, rabbet, etc. The alternative would be to use specific corner joints which need to have the side panel and top or bottom panel intersect right at the very edge. An example of this would be a dovetailed joint, a box joint, or a rabbet and lip edge. If you've ever read up on James Krenov and his work, you will find that he embraces the dowelled corner joint for these very same reasons. This is where I received the inspiration for this type of joint and its virtues.

Creating the doweled joint involves some measurement , but most importantly it involves the little jig you can see in the photo, the dowelling guide. This is a piece of wood with the exact dimensions of the panel I am dowelling, the length and thickness. The dowel holes are marked with arbitrary spacing and the dowel guide holes are bored out on the drill press. I use this dowelling guide to create the dowel holes on both of the mating surfaces , in this case the side panel and the top or bottom panel. There is some skill involved in aligning the dowelling guide to both surfaces since the holes for the dowels need to be perfectly aligned. Marking and orienting the dowelling guide to the correct edges becomes very important and I make many pencil marks in the process. The old adage, "measure twice , cut once" becomes "measure and mark three times, drill once". in this process.

Thursday, September 11, 2008

Under wraps...

These past four weeks I have been working on two new pieces of furniture. The first is intended for a gallery exhibition and the second to be entered in an upcoming local furniture exhibition. Unfortunately I will not be able to share the design and build of both these pieces for a while. The second piece intended for the exhibition, is essentially under wraps as all entries need to be in and judged by a certain date. I can say that I am really enjoying creating these two pieces as they are purely on built on speculation and I therefore have complete carte blanche on what I make.

Once I have completed these two pieces I will continue with the beech cabinet on stand which is currently on the back burner. I would estimate I can continue my work on the cabinet on stand in the first week of October. The two pieces I am working on are purposely not very large so I can instead focus on some extra detail I can hopefully incorporate into the design. Sometimes we need to take a leap forward and move into uncharted design territory to be able to add new skill sets and techniques to our furniture making repertoire. We need to regularly challenge ourselves. Wood selection has been a bit of a challenge lately as I have a difficult time locating wood with nice grain and good graphics. Most of what I find is suitable for cabinet work and not so much for fine furniture. Veneering becomes more of a viable option to circumvent this issue. Once I have boards with ideal grain pattern, graphics or figure in my hands I can simply slice veneers from it to use as components of furniture I am creating.

Friday, July 25, 2008

Cabinet base (2)...

I have let the components of the cabinet base or the cabinet stand sit for a couple of days to have them release any internal tension from the resawing operations performed earlier. This tension is due to the interior part of the wood not being as dry as the outside , therefore typically contracting inwards to form a concave form. After a day or so I began to plane the legs a small amount to create flat reference surfaces on two adjacent sides. I then use these perfectly flat sides to dimension the legs to the proper thickness all around. This is one area where it is best to take the time and do it right regarding the judicious dimensioning. I monitor the leg stability every so often, making sure there is no bowing or twist occurring from pent up tension. Th extra material I had left in each dimension would allow me to remove this safely if it does occur. I have also highlighted the grain orientation of the legs and aprons.

I also have the parts for the four aprons almost ready, they are rough dimensioned at this stage with a flat reference surface. I also check this flat reference surface periodically to confirm that it is still flat and not cupped, bowed, etc. When these base or stand components have stabilized further, I will dimension them to the finished sizes. Afterwards, I introduce a taper to each of the legs which I perform initially with the bandsaw and then handplaning the surfaces flat. I also have the blank for the drawer faces selected. The blank is a straight, fine grained Santos mahogany and from it I will rough cut three drawer faces.

Well, it's that time of year again. My wife and I are off to the mountains for a few days of hiking, kayaking and relaxing. With our warm and humid summers up here, we like to go to the mountains as it's cooler and drier. I'll continue where I left off when I am back.

Wednesday, July 23, 2008

Cabinet base (1)...

We have decided to go ahead with a cabinet base of the European beech. The process of creating a base from the beech slab involves a few steps. Initially the slab is partitioned for optimum use and minimal waste with an important consideration to grain orientation. Ideally, the slab is quarter-sawn. This particular slab is a cross between rift-sawn and quarter-sawn but I do need to pay attention to how the grain is oriented on the individual pieces. Ideally, the grain should be straight along the length of the aprons and all faces of the legs. The grain pattern in this case is diagonal to each face and not parallel to any of the four faces of the individual legs. I will saw the four leg blanks from the larger pieces I have already sawn with this in mind, and the possibility of re-orienting the leg blank within the larger piece of beech.

The original beech slab has now been sawn into three parts. Two of the three parts comprise the legs and the remaining part is utilized for the aprons. There are a total of four aprons, front, back, two sides. I'm cutting this slab in three stages leaving the sawn pieces to stabilize and to release any internal tensions. Since the original slab is resawn into smaller pieces, internal tension in the slab is released when resawing occurs. This isn't a hard and fast rule but in my experience occurs every time. I have also sawn the pieces oversized to allow for sawing at the next stage and the possibility of any cupping or bowing from internal stress. I leave these three sawn components to stabilize for a day or so before proceeding to the next stage of rough cutting the actual pieces which comprise the cabinet base.

Friday, July 18, 2008

Cabinet base design (1)...

The other option of wood for the cabinet base is European beech from the same slabs I used to build the cabinet itself. This would provide a uniform color between the cabinet and base. I need to weigh this uniformity vs. the contrasting wood and color of a mahogany base. Since there is a client involved in this commission, the best thing for me to is defer the decision to the client. In the meantime, I have possibly found just the right slab of beech to be able to accomplish the build of the cabinet base. The cabinet base will be composed of four aprons and four legs. I have a slab of European beech with possibly enough wood to cover these eight components. Another option I have is to have the cabinet floating above the base, this would involve two more components.

In the photo, the beech slab is marked at one end with the divisions of the different components along with a small percentage of waste and dressing for each component. If the decision is made for the beech, this will be somewhat of a challenge for me. There is little margin or error when slicing this slab, with almost no wood to make spare pieces. Forgot to mention, this is the last of the European beech I have in my studio, and would need to source some more if I need it. It is not readily available in my area. Since I love challenges, I'm looking forward to this if the client decides on a beech base.

To be continued...

Thursday, July 17, 2008

Cabinet base design...

I'm picking up where I left off on the beech cabinet I began a few weeks ago. The cabinet itself is fairly complete except for three dovetailed drawers. I will build the drawers only after having decided on the type of wood to use for the cabinet base. The reason I am doing this is to bring some of the color from the cabinet base up to the cabinet itself. The very first step in this process is to select the type and color of wood to use for the base. I have the option of either making the base of the same wood (European beech) as the cabinet itself, or selecting a contrasting wood instead. If contrasting, how much variation in the color and grain pattern also.

I've been mulling over this for a few days now as I complete some smaller items in my studio. It is not a simple decision as it can affect the complete aesthetics of the piece. I need to consider if the eyes are going to be drawn away from the upper cabinet and how much so. I also need to design the cabinet and base to be in harmony with each other. I have the actual design in mind, the stumbling block now is the color and which wood to use for the base.

In the photo, I have a fairly large plank of mahogany I have kept for quite a while now. The plank is rift-sawn and has ribbons of color in it, although subtle. Using this wood would provide the base with a reddish-brown color once the patina of the wood has developed completely. This is something that should always be considered when selecting woods for a piece of furniture. after a number of months or years, what color will the wood finally attain. It is important when using two colors or tones of wood, as the initial contrast might either become subdued or more pronounced over time.

This is one option I have, to use this plank for the base components. I should decide in the next few days however...

Saturday, July 12, 2008

Perspective on design (1)...

I sometimes ask myself, what constitutes good design. Is it the aesthetics of the piece, the pleasing proportions, the balance of form and function... or all these characteristics combined? Taking a step back, the aesthetics and pleasing proportions are definitely at the forefront. I'm usually drawn to a piece of furniture that stands out with respect to the "look" of the piece. This one characteristic causes me to stop and further examine the piece by trying to understand what has drawn me to this particular design over another design on the same page. This analysis helps me in my own design process as I better understand what characteristics of a piece of furniture I am drawn to. Of course, we all have different styles of furniture that we are drawn to, but the common theme is good design. I am convinced that even an admirer of period styles of furniture will stop at a well-designed modern piece of furniture to further analyze it.

We've all heard the saying that everything has already been discovered or invented. I have even heard of this saying applied to furniture design. After all, we're re-shaping the same objects over and over... adding curves, changing proportions, adding ornamentation, removing the ornamentation, using darker or lighter woods, utilizing curves, replacing curves with straight lines, utilizing thicker or thinner components, etc. It is easy to come to this conclusion, however, I regularly see new pieces of furniture that make me sit back and say "wow, that is an interesting design".. or "that is a cool design, I wonder if it's been done before". In light of this, I think the boundaries of design are limitless, one just needs to think outside the box. Also, I feel that often using pre-existing styles as templates for a new design sometimes handicaps the designer , the designer subconsciously has the existing style in mind and cannot get past it. Sometimes it is better to begin with a clean slate, in our case, a pad and pencil and begin to sketch without any existing furniture designs to influence our design. All for now...

Thursday, July 10, 2008

Perspective on design...

This is a previous post, but I never did continue the discourse. I find it fascinating how furniture design has evolved over the centuries. If we go back to the middle ages and the era before, quite a few developments in furniture construction techniques were in progress. Prior to this era, in the centuries before, very little furniture was available, it was considered a luxury to have chairs, tables and cabinets. The larger, more finely made furniture of this era was typically destined for the aristocracy of the time as a display of their wealth and status.

Most conventional furniture of these early periods was assembled without consideration to wood expansion and contraction or wood movement. This worked for many years, since the interior of buildings in this era was often at the same temperature as the exterior. With the advent of heated interiors, wood movement became much more of a factor to deal with in construction and design of furniture, and the practice of simply assembling wood planks together to form furniture needed to evolve. It was in the middle ages that frame and panel construction was adopted. This technique allowed a solid wood panel to literally float within a wood frame composed of rails and stiles. The solid wood panel could expand and contract on a seasonal basis, and not cause any structural failure within the furniture.

All of a sudden many more possibilities were created for furniture design and its widespread appeal began in earnest. Furniture also began to become more affordable as of the 18th and 19th century, more furniture makers existed and sound construction techniques began to become standardized. There are numerous periods over the past centuries and each of these had a style or styles associated with them. Additionally, each country had a style of its own within these periods. One can see how similar furniture design principles were adopted by successive countries over the different periods. Popular furniture styles which are widely recognized have familiar names such as English Chippendale, German Biedermeier, American Federal and Arts & Crafts, French Art Nouveau, Italian Rococo, etc. The evolution continues to more recent styles such as Modern Swedish ( Krenov style) and Contemporary styles.

One interesting tidbit is that a style of furniture is never really defined until the particular period has elapsed, almost like looking through a rear view mirror. Today's styles might be referred to as a particular period of style, but only after the period has lapsed. In the photo, a small swedish modern styled tabletop cabinet . To be continued...

Tuesday, June 24, 2008

Dash almost complete...

In my last post I had the dash veneered on both sides and the cutouts for the gauges and switches prepared . I am now kicking myself for not taking a picture of the dash panel when I received it and the dismal state it was in. In any case, I began to apply the finish which consisted of a lightly tinted danish oil, the tint a light colored shade of walnut. After I let this dry for two days, I began to apply the top coat of a wipe-on polyurethane. Since the dash panel is exposed to temperature and environmental extremes, humidity, and possibly direct sunlight, polyurethane is a good finish to seal out the elements. The original dash panel delaminated and the veneer was flaking off due to these same environmental extremes, so I had to make sure the correct finish is applied.

I'm just about done with applying the multiple coats of this wipe-on poly with light sanding between coats with fine sandpaper. The back of the dash panel is similarly top coated with a polyurethane finish along with the continuous edge of the dash panel and the gauge openings. I'm trying to leave nothing to chance with respect to moisture or humidity permeating the dash panel.

In the photo, I have a portion of the dash panel. The bird's eye figure stands out well and is deep and vibrant. Next I will complete assembly of the small glove box hardware and ship off to the owner. From what I understand the restore of the vintage TR6 is going to be complete in a matter of weeks and I also look forward to seeing the dash in the car. If you click the image you can see more detail in a larger photo.

Thursday, June 19, 2008

A different type of woodworking...

I've been tasked with reconstructing the wood dash panel from a vintage British automobile which is currently being restored. The dash was previously veneered and after about thirty five years, it succumbed to the elements and began to delaminate. Along with this, the original veneered surfaces were cracked and flaking off. This is a type of work I have not done before. The only effective way to remove the veneer completely and uniformly was with a sanding machine. After performing this on either side of the dash panel, I had clean wood underneath. The wood was high grade plywood with many plies. I judiciously re-laminated the laminations which were separating, which was no small feat. Once I was completely satisfied that the plywood dash had regained its strength and rigidity I began to plan the application of veneers both on the face and back of the dash panel.

The veneers were applied one at a time, beginning with the back of the dash panel. I cross banded or alternated two layers of the back cherry veneers to add rigidity and strength to the dash panel. I next cut out the multitude of holes from the back along with screw holes and rectangular cut-outs. I used reamers, sanding pads, and small half-round and round files to accomplish this.After I was satisfied with this, I applied veneer, bird's eye maple, to the face of the dash. Similar to the back, I re-created the holes, cut-outs, etc. from the front. Next, I veneered the glove compartment box door following the same procedure.

In the photo, I have just completed veneering and sanding the dash panel, glove compartment door, and have it fitted in its opening. Some more small detail work and I am almost ready to apply finish to the dash panel. There were some stressful moments in all this, veneer being so thin with very little margin for error, but it seems to have worked out. I thought I would share this experience.

Thursday, May 29, 2008

Drawer cases installed...

After some deliberation, I decided that I really like the drawer case layout and went ahead and permanently installed them in the cabinet. The mounting method I arrived at is actually quite straightforward. The right hand drawer case is pegged to the bottom of the cabinet with four short dowel pieces. It is not directly attached to either the back or right side of the cabinet with this method, eliminating any wood movement issues however small they might be. The left hand single drawer case is also not directly attached to the cabinet side or back for the same reason. Instead I created a small platform for the left drawer case using two pieces of beech with grain in the same direction as the rest of the cabinet.

The two pieces of beech are directly below the left drawer case on either side and do not extend completely to the front, but approximately one half the distance. The drawer case can be considered to be cantilevered on this small platform. Also, to make the platform sides somewhat subtle in appearance, I created a fair size chamfer at the leading edges rather than have a square edge. This has successfully accomplished the effect I intended. The platform sides are pegged to the cabinet and right hand drawer case with one alignment dowel and subsequently glued to the left side and right drawer case. The back is open however, and the back panel can be seen in the opening.

I attached the left drawer case to the platform sides with 3 vertical lengths of dowels on either side, this adds considerable strength to the left drawer case. In doing so, I have left myself the option for the hidden compartment panel I might or might not install later on. In the photo, you can see the chamfered platform sides. Next, I begin to plan the actual drawers, something I've been longing to begin.

Wednesday, May 14, 2008

Laying out the drawer cases (1)...

I have had to take a short break from this project due to circumstances and other work in my schedule. I'm back on track with this cabinet now and I am in the process of laying out the configuration of the drawer cases. The original plan had one upper drawer at the top left and the two drawer assembly at the lower right. Upon reflection, I decided to configure the drawer cases differently as in the photo. This is somewhat of a staggered, stepped arrangement with the appearance of a floating drawer at the left with the original location of the two drawer case at the right. Since I have complete freedom to lay out the drawer cases as long as there is sufficient room above either of the drawer cases for art objects, I have taken this liberty in the design process.

At the left, beneath the single drawer case, I am also considering a false front which would appear as a solid piece of wood and is only removable through a hidden slot. This feature can be considered a secret compartment. I like the idea, but I also like the design of having the left drawer case appear to be floating as in the photo. I have mocked up the drawer cases with the empty compartment at the bottom left.

This is my current design dilemma and I will continue to experiment with the layout of the drawer cases.

Sunday, April 27, 2008

Preparing the drawer cases (5)...

I left off with the individual boards which comprise the two drawer cases. I moved on, trimmed the boards and created the joinery for the sides and top and bottom. The joinery will consist of a rabbet with some small reinforcement. I need to accurately trim the sides of the dual drawer case since there is an allowance for the middle drawer divider which needs to be taken into consideration. The accuracy revolves around the fact that I want each of the three drawers to be of the same general height.The dado for this particular divider will also be stopped, end just short of the front of the drawer case. This allows me to have the upper drawer have a lower lip to meet with the bottom drawer, hiding the center divider in the process.

In the photo, the drawer cases, not yet complete are placed sided by side and amazingly enough, there is hardly a gap between them. This allows me some flexibility in placement of the drawer cases, which has not quite been finalized yet.

Tuesday, April 22, 2008

Preparing the drawer cases (4)...

I have completed dimensioning, handplaning and scraping the surfaces of the panels for the drawer cases. The panels were longer in length than necessary, an extra length allowance of each of the panels comprises one side of each drawer case. These drawer case sides will be rabbeted into the top and bottom panels. The grain orientation of the drawer cases is similar to the cabinet top and bottom, this is purposely designed in to accommodate any expansion and contraction due to humidity changes in the ambient air. In the lower drawer case, the sides are somewhat longer to accommodate two drawers and a drawer divider. The hardwood drawer divider will be fitted into dadoed slots in the center of either side of the drawer case. Dadoes run perpendicular to grain orientation as opposed to grooves which run parallel to the grain orientation.

The drawer case sides, and top and bottom panels are oriented in the same direction to have the complete drawer case movement occur front to back similar to the cabinet itself. The drawer case sides need to be trimmed to size next and then a dado created in the dual drawer case. The drawer cases are assembled afterwards with careful attention to maintaining the drawer cases perfectly square. Once the assembly is complete, I will fit the drawer divider into its dado.

I'm anxious to begin work on the drawers and have yet to decide whether the drawer faces will be a contrasting color, most likely so. In this case, I need to find a wood which complements European Beech.

Wednesday, April 16, 2008

Preparing the drawer cases (3)...

The measurements of the boards which comprise the four drawer case panels are a tad smaller than originally planned, so I have had to forgo squaring the ends of the boards of each of eight boards. Instead I have assembled the eight boards into four panels and will instead square then ends of these panels off. It is just an arbitrary decision at this point and doesn't affect the assembly of the panels, although nicer panels would have resulted had I squared the ends of the boards first. This also allows me to dial in as much length as absolutely possible in each of the panels.

I had also jointed the mating edges of each of the boards, the edge which mates with the other, matching board of the panel. This went well and I let the boards sit for a day or so afterwards to determine if any further cupping would result. A very small bit of cupping did result, and of course it becomes more pronounced due to the width of the panels. The next step involved scribbling witness lines across each of the cupped faces of the boards and handplaning the outside edge area working towards the middle. I regularly go back and forth with a flat, steel rule to determine how much progress is being made. I also try not to overshoot... which essentially decreases the overall thickness of each of the boards.

At this point, I have four panels ready to be squared to finish dimensions, both in width and length. A small part of each of the panels form the sides of the drawer case. I will also need to cross cut these sections off, which leaves me with four shorter panels which form the tops and bottoms of the drawer case.

I'm going to take some time and spend it outdoors today. We had wintry weather until late last week, but this week has been getting wamer and sunnier with temps in the low 70's today. We've had such a long winter up here, and this weather couldn't arrive soon enough.

Sunday, April 13, 2008

Preparing the drawer cases (2)...

I left off in the previous post with a few boards to flatten and smooth with handplanes. I typically use a planing board with a plane stop at the end to perform this type of work. The boards are relatively small and are easily held against the plane stop. This allows me to quickly flip the board around to plane either side without needing to clamp the board again. If I were planing a larger panel I would most likely fasten it between bench dogs.

The handplaning of these particular boards is straightforward along their length with little diagonal planing... so it works out well. Handplaning these boards which will comprise the panels for the drawer cases begins with a long fore or jointer plane to flatten the faces of the boards and ensure they are flat and parallel to each other. I also have the final thickness of each board in mind and work towards this. After the individual boards were resawn a little cupping was introduced , inherent to resawing, and although acclimatization to the studio environment helps to relieve this cup and any other tension in the boards, some minimal cupping remains in each of these boards.

I use a jointer plane in this case, I have it tuned and ready most of the time for work like this. A shorter fore plane would also be ideal since the boards are relatively short in length. Once the boards faces are flat with parallel faces I then move on to a finely tuned smoother plane to ensure the faces of the boards are flat as can be. The term which is used for this type of board preparation is four-squaring the board which ensures that both faces and the two long edges are parallel to each other, and the ends and edges are perpendicular. After completing this process on each of the other boards which will comprise the drawer case panels, I will be squaring the ends to achieve both the correct length of each board and to ensure the boards are perfectly square.

Saturday, April 12, 2008

Preparing the drawer cases (1)...

After slicing (resawing) and dicing (ripping, cross-cutting) the rough blanks for the interior parts, I am now left with a few fairly identically sized boards. The individual boards are thicker than the final dimension to allow for any cupping ,bowing, or twist that may result from the resawing operation and acclimatization of the boards. I have also resawn a few extra boards to allow for any problems or mismatched grain when creating the wider panels for the drawer cases. The boards are fairly similar in width but differ in length. Half are destined for the single drawer case, the other half to the stacked drawer case. Some wane or bark can be seen on a few of the boards and this will be trimmed off to create square edges with minimal removal.

I will let these boards sit on edge for a day or so and then proceed with hand planing them closer to the final thickness. Once the "approximate" final thickness is achieved, the next step in the sequence is to square the mating edges and join these boards to create the panels for the drawer cases. There are two approaches to creating the panels, either glue the boards up initially and hand plane or surface the panel to final thickness or ..... hand plane the individual boards close to final thickness and then join to make a panel. I prefer the latter as any strange characteristics of each board will be manifested before joining. This allows me to substitute one board for another, more stable board. Of course, there is a little final hand plane surfacing to complete the thicknessing to size step, but very minimal.

Friday, April 11, 2008

Selecting wood for the interior...

After having decided on a layout for the interior, I proceeded to take measurements of the
drawer case mockups. With these measurements in hand, I then create a cut list. The cut list provides me a clear idea of the amount of wood necessary to make both the drawer cases. The cut list also allows me to optimize the individual components for the drawer cases in order to minimize the wood necessary. This is only valid to a point however, as the wood components need to be selected with careful consideration to grain orientation and to maintain the harmony of the individual drawer cases.

With this information in hand, I selected an area of a large beech plank to cut my blanks from. Fortunately, I have some very nice European Beech planks in my studio I had acquired a while ago. The planks are rift to quarter-sawn in grain orientation and fairly thick at approximately 2.5 inches. The blanks are slightly different in size and are rift-sawn. The difference in blank size is attributed to the different size of either of the drawer cases. In the photo above, the two blanks can be seen along with my measurements and cut list. I also drew the components of the drawer cases out on another sheet of cardboard as a visual aid in laying out the components. Since the depth of the drawer cases is fairly large, I will be gluing two pieces of beech for each of the tops, bottoms and sides of the drawer cases. In doing this, I will try to maintain grain orientation and harmony to create fairly seamless components for the drawer cases.

Next I will layout and mark the boards to be cut from both of these beech blanks. After cutting the blanks in half and squaring one face and one edge of the individual halves , I will slice the boards off using a bandsaw similar to resawing.

Monday, April 7, 2008

Cabinet interior mock up...

I have been mocking up a few different layouts for the interior of the cabinet in the past few days. There are certain criteria which need to be considered in this process. The original design calls for three drawers with maximized interior space for art objects. One of the factors used in the design of the layout is the height and width of the cabinet itself and allowing as much room for taller art objects. This space will co-exist with the three drawers. Initially, I designed the drawers on the right hand side of the cabinet interior with two lower drawers, a space for art object(s), and a drawer above. I had also considered shelving in the design but decided against this as the height of the cabinet would further limit any taller art objects from being displayed.

In the photo, is my latest design of the interior. This layout is a good example of the design adage, "less is sometimes more". There is a fair amount of room on both the left and right side of the cabinet interior. The drawers have been divided into two assemblies with one drawer at the top left and two drawers at the bottom right of the cabinet interior. The design is also somewhat interesting and does not conform to the typical, established layout of drawers within a cabinet. This feature enhances the uniqueness of the cabinet interior in my opinion.

This design is not quite cast in stone as yet. I intend to further refine the layout with both interesting, unique design and optimized space as criteria. Mocking up is a great exercise in the design process, both initially and in finalizing the design. Having the components of a furniture piece mocked up to scale proportions reveals any design considerations which might have been overlooked in the initial design.

Sunday, March 23, 2008

Cabinet taking shape...

I now have the cabinet case, back panel , and front doors installed and adjusted. Everything looks fine at this point, with my next emphasis on the interior of the cabinet. Afterwards, I will finalize the design of the cabinet stand. With respect to the interior, I have a design idea in mind and have begun to make a few sketches. I will most likely leave the left hand side of the interior free and clear and build up the right with two stacked drawers and perhaps a third drawer further up. This design allows the right hand door to be opened independently in the sense that drawers can be accessed without the need to open both doors. This part of the design is interesting and helps me to resolve the division of the interior compartments.The client has indicated I have carte blanche to design the interior as I wish with the only requirement to have one large and one smaller space for art objects, along with two drawers. Sometimes less is more and in this case ( no pun intended) the larger the non-drawer compartments, the larger the objects which can be showcased.

In the photo, I use tape as temporary door pulls while I decide on the door pull design. I'm debating whether to simply have one pull located on the right hand door. If I decide on one door pull, I will elaborate on the thought process leading to this decision.

After my return from a ski trip this week I will be dedicating the next few days to finalizing the design of the interior and beginning to create it. On this ski trip, my wife and I are staying in a small resort town with surrounding towns that have plenty of small shops and boutiques. We both plan to glean some fresh design ideas from other visual objects, not necessarily wood objects... and inspiration for this piece of furniture and other, future designs along with inspiration for her wood inlay jewelry designs.

Friday, March 21, 2008

Contrasting stiles...

A cherry cabinet on stand I built three years ago had developed a small bow in the inside vertical stile of the right hand door. This happened a few weeks after I completed it. I kept telling myself I would one day either make some new doors or replace the bowed stile in the right hand door. Well, I finally decided to do this. I hunkered down , disassembled the right hand door and replaced both the inside lipped stile and the top rail. The cherry cabinet was originally finished with multiple thinned coats of super blonde shellac. Cherry develops a wonderful color and patina as it ages. There is no sense in staining this particular wood as the natural aging process and exposure to light and air provide the most beautiful color. We had this cabinet around for the past three years as it slowly developed the cherry patina. It is sometimes difficult to appreciate how much of a color change has actually occurred since the cabinet ages uniformly.

Well, I found out how much it aged and developed a dark color when I began to replace parts of the right hand cabinet door. The photo has the inner lipped stile and the top rail as fresh, new wood. I made sure to have these two pieces acclimate in my studio for a couple of weeks. The contrast is incredible... with nothing originally applied to the cherry cabinet but super blonde shellac and wax, no stain of any type applied. I took this photo to be able to show any prospective clients just how much cherry changes over time.

I notice the issue of either staining or leaving cherry to develop it's own aged color comes up occasionally in forums and the overwhelming advice given is to let it develop its own color over time. When you see the difference, it is easier to accept this advice.

I thought I would share this..

Wednesday, March 19, 2008

Door lip and rabbet...

Rather than leave an open gap between the doors, even a small one, it is much preferred to create a mating set of lip and rabbet along the inner edges of the front door panels. This serves to provide a positive closure of the doors and masks the very small reveal between the doors. In this particular case , I create an outside lip or rabbet on the right hand door as this is the first door opened. The method I utilize is to mark the outline of the rabbet, in my case 1/4 in. X 1/4 in. and begin to remove material at the edge of the right hand door. The wood removed is part of the hardwood edging I installed within the door panel edges prior to veneering. The tool I use is a skew rabbet block plane with adjustable fence. This particular plane is based on the Stanley No. 140 plane. I added a wood auxiliary fence to the plane to extend the bearing surface of the plane against the edge of the door panel.


This process went along fairly well without any surprises and afterwards I re-installed the door and began to fit the mating edge to it. This rabbet will mate perfectly with the right hand door edge. Rather than concern myself with a slightly wider left hand door I add a lip of the same wood and grain orientation to the inner edge of the left door instead. This allows me to create two identically sized door panels and since veneer is involved, the complexity of the process is simpler if the door panels are of equal dimensions.


I currently have the left hand door rabbeted edge in the process of glue-up and afterwards I will perform any small trimming to ensure the fit is perfect between the doors. There is a small, slightly greater than 1/32 in. gap between the doors at the moment which will have less of a reveal apparent once the lipped edges are created and installed.


Tuesday, March 18, 2008

Door panels (4)...

Once the mortises for the knife hinges are successfully created and care is taken to make certain the offsets are uniform and the depth of each knife leaf is consistent, the next step is to temporarily install the doors while fitting each door to the cabinet. The reveal around each door is important as well as any small differences in how the doors hang within the cabinet frame. In this photo the cabinet is reversed in orientation top to bottom for me to work on the fitting. The left door is in the photo. The knife hinges have a very small amount of leeway for me to adjust the doors so the reveal at both the top and bottom and the center part between doors is uniform.

I also need to be conscious of how the outside edges fit the cabinet , they need to be parallel and in the same plane as the cabinet sides. The fitting of the doors can be somewhat time consuming but in my opinion this needs to be done correctly at this stage or the visual impact of a non-uniform reveal will be very apparent later.

After completing this fitting and knife hinge adjustment I will be creating the lip at the juncture of the doors in the middle of the cabinet. The lip serves to hide any open space between the doors and also to create an interlocking, positive closure for the doors. The right hand door will have a rabbeted lip whereas the left hand door will have a additional piece of beech added to the rear of the center edge of the door to form a mating lip. To maintain grain matching I have pieces of beech left over from the same plank I used to resaw the veneers earlier.

We have plenty of snow up here at this time , more than the average winter, and my wife and I will be leaving for a skiing trip at a resort next week. We're both crazy about spring skiing and there is plenty of nice weather coming up.

Monday, March 17, 2008

Door panels (3)...

After the doors are fitted into the cabinet opening the next step is to layout and create the hinge mortises for the knife hinge pairs. Each door has one pair of knife hinges as they come in pairs. I use spacers and my small adjustable square to make certain the doors are spaced uniformly from the cabinet case. This is important as the door reveal all around needs to be uniform. After the hinges mortises are marked the process of creating the recesses is accomplished with small chisels and a small hammer.

The hinge markings are transferred from the doors to the cabinet to maintain accuracy.Creating the hinge mortises with hand tools is somewhat of a pleasant task although it can take a while. Care needs to be exercised with grain orientation as the grain is reversed depending on which corner of the cabinet is being mortised. I use both chisel bevel down and back down orientation to remove waste from the hinge recesses. The outline of the hinge and its offset from the edge of the cabinet and doors is fairly important.

Once this is accomplished, removing material from the recess is fairly foolproof. I remove wood from the hinge recess in stages, exercising care not to go too deep in one pass of the chisel.

Thursday, March 13, 2008

Door panels (2)...

I now have the door panels assembled and roughly fitted to the cabinet front enclosure. In the previous post I mentioned that I had stumbled on to some nicely figured European beech. This is an excellent example of the concept and term dynamic design I described in a much earlier post. As much as I like to follow through with a pre-existing design, when an opportunity presents itself and I can enhance a design,a strong consideration is given to seizing this opportunity. My original design was nebulous regarding the front doors, I had some sort of inlay in mind as an embellishment. The figure I have found in these slices of European beech are, in my opinion, a more natural embellishment and if oriented correctly, dramatically change the front graphics of the cabinet.

Some judicious resawing and a short time later and I had enough veneer slices to create the bookmatched veneers for the fronts of the door panels. I utilize straight-grained beech veneers for the back of the door panels. The veneers are edge jointed prior to assembling together to form each of the four sheets for the two door panels. I take great care in veneering the substrates for the door panels and make sure that the substrates are perfectly flat and smooth since the veneers will telegraph any bumps or surface irregularities into the top surface.

In the photo, I have the door panels mocked up in the cabinet front to determine if the aesthetics are both correct and pleasing. I'm not looking for complete symmetry at this point and this is obvious in the detail of the figure of the individual door panels. There is instead, a partial symmetry in the door graphics which makes us more aware of the natural growth pattern of wood.

Next I make preparations for installation of the knife hinges for the doors after some final fitting of the doors within the cabinet opening.