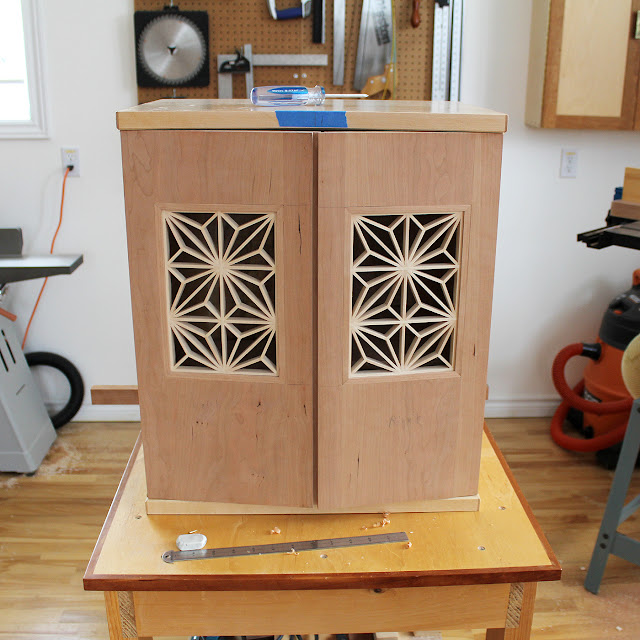
Having mastered the Kumiko process for the asa-no-ha pattern and in the process created several panels, I soon realized that they should be applied to a project. Kumiko panels on their own are only decorative, they are really meant to be incorporated into furniture, shoji screens, etc.
Without a new project in mind and after some brainstorming with my wife, the idea was hatched to integrate one of the larger Kumiko panels into an existing piece of furniture. While discussing, my latest Krenov display cabinet was directly in front of us. Hey, why not experiment with the Kumiko panel on this cabinet. So a cardboard mockup of one door was created and a large Kumiko panel carefully fitted in to be able to view the inside of the cabinet.
After some discussion, we both agreed that the idea was worthy of further exploration. I also secretly wanted an excuse to create more Kumiko panels and become better at it and to develop techniques. Next, two matching Kumiko panels were created and framed with cherry pieces. It was also decided to create the doors out of cherry. Selecting the wood for the doors was not an easy one. Lately, I have been making an effort to draw down my existing inventory of wood. I have so much existing inventory and it doesn't make sense to keep purchasing more wood. The only issue was the grain orientation of the wood. Since these are doors with about 9 inches in width, I preferred quarter-saw or at the least rift-sawn for dimensional stability. After exhaustively searching my pile and deliberating, a single cherry plank appeared to meet the criteria... for the most part. I also wanted a wood that would have the lighter Kumiko panels stand out. Cherry normally darkens with age and exposure to light, so this was an critical consideration. The cherry plank was selected since it was light pink or brown and was not likely to turn a deep red. I preferred a medium colored brown as the final color, to match the cabinet stand and interior drawer fronts. With cherry, the final color is often a crap shoot. So cherry it was for the doors.
The cherry plank was sawn and laid out for the door components. Doors assembled with an opening for the Kumiko panels. Kumiko panels were fitted in and temporarily attached as seen directly below. All is good at this point, the Kumiko panels fit like a glove. Door components were selected and laid out to minimize any horizontal movement across their width.
Proceeded to then create a lip and rabbet where the doors meet and to permanently install the Kumiko panels. It was absolutely necessary for the new doors to perfectly match the original doors in both width, length and thickness. This was due to the knife hinges used and the close tolerances necessary for their operation. The door reveals were also an important criteria. In other word, the new doors would need to be dimensionally exact as the original doors.
The photos above show the progression in both dimensioning the doors to size and creating the lip and rabbet where they meet. The last photos below have both doors installed in the cabinet prior to application of a shellac finish. The single right cocobolo door pull is also prepared and fitted but will only be installed as a last step. A temporary basswood filler piece is inserted in the mortise for the door pull. From previous experience, a protruding door pull seriously gets in the way of applying a French Polish type of finish.
Follow me on Instagram for progress updates:
Instagram: @woodskillsmag and @pirollodesign


