Showing posts with label furniture making. Show all posts

Wednesday, March 4, 2020

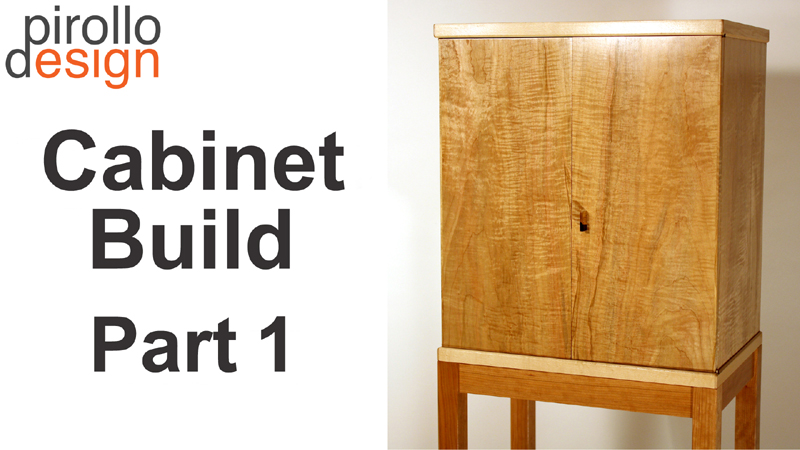
Cabinet on Stand

A while ago, I created a small cabinet that had been designed to be table-mounted. Over time, the issue was lack of table space causing me to move the small cabinet here and there. It seemed to always be in the way. Of course, it could have been converted to a small jewelry cabinet, but there was no demand for this. A little thought went in to the next life of the cabinet and the idea of mounting it on a dedicated stand came up. So this is what I did. The cabinet itself is not deep and a stand would need to compensate and add depth to the structure. Unless the depth was increased, there would not be sufficient stability.

After some thought, re-visiting earlier designs of mine, and perusing though James Krenov's designs, it came to me. The cabinet would float over the stand allowing me to increase the depth by approximately 1.5 inches. Along with is, I introduced the technique of bird's feet at the bottom. These elongated, arced wood elements extended the depth or form another 2 inches. All told, the new depth was sufficient to make the cabinet on stand stable.

The build also consisted of some modifications to the actual European beech cabinet. New drawer faces, applied contrasting edging and lowering of the base. Cherry was selected for the stand to contrast with the much lighter beech of the cabinet. The cherry stand was built separately. Legs are rift-sawn cherry and the rails are staggered to lighten up the façade and introduce strength and rigidity. Since there are no lower rails in this stand design, the upper, offset rails would need to be mortised into the legs. I also added a contrasting piece of inlay to the upper front rail of the stand to balance the aesthetic. Images below are after the completion of the build and approximately a week later. Cherry has become darker since, as seen in later images.


Friday, April 12, 2019

New woodworking book...

So after a tumultuous month of March, the latest woodworking book is complete and published. Available in digital and print. March began with a bang (literally). My wife and I were broadsided at an intersection causing our SUV to roll and slide down the road for 100 ft. or more. We got out with aches, pains and bruises but on the mend now. The healing time allowed me to focus on this book more heavily and today I am happy to announce it's release! Below is a description for the book.


Decades of furniture making experience combine with furniture design in this new and refreshing take on woodworking. In addition to detailed furniture making techniques, the book delves into the thought process behind furniture design. Skills and processes to advance you as a woodworker and furniture maker are described. The book is also a window on the life of a furniture maker. Although the focus of the book is hand tools, use of machines in the preparatory phase of a furniture build is addressed. Time and labor-saving precision hand tool procedures are discussed. The emphasis turns to hand tools in latter stages of a furniture build where attention to detail is necessary. A reverence to wood as a medium is featured throughout the book.

Homage is paid to classic techniques such as dovetail joinery and workbench processes. As well as the traditional, modern techniques and processes are put forward to make your furniture designs stand out and be unique. The focus is one of a kind furniture, the unique furniture and wood objects that separate you from other makers. As a furniture designer + maker, discover my passion, what drives me and where I draw inspiration from. Learn how to develop your own style, aesthetic and voice in furniture design. It is not the how but the why behind the process that is often critical in a furniture maker's mind and practice.

The premise for this book is to provide insight into the craft of woodworking and more specifically the creation of furniture. The book is composed of sections, each of which is critical to your woodworking journey. Acquiring skills and knowledge in the last century involved taking classes, reading books or mentoring with a knowledgeable woodworker. Today, in comparison, there is a wealth of knowledge available through the Internet. What is lacking however, is the hands on aspect of the craft of woodworking. Learning involves making. I know of no one that learned a craft by simply reading and not applying themselves. It is critical to embrace the often lengthy learning curve involved. This book includes several articles focusing on aspects of woodworking in a contemporary world.

The book is composed of four sections. Each section contains articles that a woodworker or furniture maker will need to embrace as they evolve. The first section introduces basic woodworking skills. A large part of this book is devoted to hand tool skills. Although machines are combined with hand tools in my furniture making, I advocate that woodworkers should embrace hand tools. It is necessary to form a connection between hand and wood medium prior to seeking efficiency and a production mindset. Hand tools often get a bad rap as being slow and tedious. Instead, what hand tools offer is control,  dexterity, quiet and a close connection to the wood medium. In a one person furniture making studio, hand tools offer a healthy balance to the use of machines. Projects include through dovetails, portable board jack build, moxon vise build, and knife hinge install.

The second or  furniture maker section provides a glimpse into furniture making as a career. Woodworkers often aspire to become furniture makers or go into business for themselves. As a furniture maker for several decades, I share knowledge and insight acquired over the years. Some articles will inspire you to take the leap and become a full time furniture maker. Topics in the section include setting up shop, the furniture maker journey, the furniture maker lifestyle, social media for a furniture maker, and insight into diverging from furniture making to other forms of woodworking.

The third section is devoted to furniture design. Furniture design forms a large part of woodworking. Often, it is necessary to design a complete piece of furniture or modify an existing design. The design process has evolved over past decades with the advent of computer software (CAD). Pencil and paper are now combined with CAD. Articles include how to create and refine a design, the concept of form and function and how it applies to furniture.

The fourth or advanced woodworking section delves into techniques to further your woodworking and furniture making. Veneering techniques, both manual and vacuum veneering are described. The process of creating a jewelry box is discussed in one article. The Japanese art of Kumiko is described in a final article.

235 Pages, 8.5 X 11 in. Non-fiction.  
Digital:
  WOODWORKING: FROM DESIGN TO MAKING 
Print Edition: 
WOODWORKING: FROM DESIGN TO MAKING 


Thursday, January 31, 2019

Kumiko cabinet doors...

After exploring Japanese Kumiko and in particular the asa-no-ha pattern or motif, I created a few panels. I also took it one step forward and framed the panels with pieces of cherry or mahogany I had lying around. The asa-no-ha pattern below seems to be the most popular and it can be seen reproduced by several woodworkers.


Having mastered the Kumiko process for the asa-no-ha pattern and in the process created several panels, I soon realized that they should be applied to a project. Kumiko panels on their own are only decorative, they are really meant to be incorporated into furniture, shoji screens, etc.

Without a new project in mind and after some brainstorming with my wife, the idea was hatched to integrate one of the larger Kumiko panels into an existing piece of furniture. While discussing, my latest Krenov display cabinet was directly in front of us. Hey, why not experiment with the Kumiko panel on this cabinet. So a cardboard mockup of one door was created and a large Kumiko panel carefully fitted in to be able to view the inside of the cabinet.


After some discussion, we both agreed that the idea was worthy of further exploration. I also secretly wanted an excuse to create more Kumiko panels and become better at it and to develop techniques. Next, two matching Kumiko panels were created and framed with cherry pieces. It was also decided to create the doors out of cherry. Selecting the wood for the doors was not an easy one. Lately, I have been making an effort to draw down my existing inventory of wood. I have so much existing inventory and it doesn't make sense to keep purchasing more wood. The only issue was the grain orientation of the wood. Since these are doors with about 9 inches in width, I preferred quarter-saw or at the least rift-sawn for dimensional stability. After exhaustively searching my pile and deliberating, a single cherry plank appeared to meet the criteria... for the most part. I also wanted a wood that would have the lighter Kumiko panels stand out. Cherry normally darkens with age and exposure to light, so this was an critical consideration. The cherry plank was selected since it was light pink or brown and was not likely to turn a deep red. I preferred a medium colored brown as the final color, to match the cabinet stand and interior drawer fronts. With cherry, the final color is often a crap shoot. So cherry it was for the doors.

The cherry plank was sawn and laid out for the door components. Doors assembled with an opening for the Kumiko panels. Kumiko panels were fitted in and temporarily attached as seen directly below. All is good at this point, the Kumiko panels fit like a glove. Door components were selected and laid out to minimize any horizontal movement across their width.


Proceeded to then create a lip and rabbet where the doors meet and to permanently install the Kumiko panels. It was absolutely necessary for the new doors to perfectly match the original doors in both width, length and thickness. This was due to the knife hinges used and the close tolerances necessary for their operation. The door reveals were also an important criteria. In other word, the new doors would need to be dimensionally exact as the original doors.


The photos above show the progression in both dimensioning the doors to size and creating the lip and rabbet where they meet. The last photos below have both doors installed in the cabinet prior to application of a shellac finish. The single right cocobolo door pull is also prepared and fitted but will only be installed as a last step. A temporary basswood filler piece is inserted in the mortise for the door pull. From previous experience, a protruding door pull seriously gets in the way of applying a French Polish type of finish.


Follow me on Instagram for progress updates:
Instagram:  @woodskillsmag and @pirollodesign

Friday, December 21, 2018

A Krenov revival...

Apologies for not posting more regularly but most of my project builds and images have moved to Instagram, @woodskillsmag and @pirollodesign. I've been working on my latest piece for a few weeks now. It is a cabinet on stand inspired by James Krenov work and philosophy. The story behind this particular piece is as follows. I originally created a similar piece to this in early 2012 and looked forward to making another a few months later.

Original cabinet on stand designed and created in 2012. Door and side panels are veneered with figured Big Leaf maple, interior is soft maple, back panels are Ambrosia maple, stand is cherry.

The design adheres to the principles of Krenov, construction follows his methods and philosophy, and the aesthetic is clean, minimalist and devoid of ornamentation. This has also become my furniture making style in the past 14 years or so. I discovered the work of James Krenov about 14 years ago and read his books quite regularly, each time extracting a new nuance or so. This was the age when learning from woodworking books was the preferred way of understanding woodworking. I followed Krenov's writing and tried to glean as much technical information from the grainy black and white photos in several of his books. A little while later, I attended a furniture making school that was founded on the principles of James Krenov and College of the Redwoods. It was one of a very few schools in North America espousing the tradition of hand work. This experience opened my eyes to a slower form of furniture making where the focus is on the wood itself and attention to detail is paramount. Where am I going with this? Well, between the years 2012 and 2018 I pursued a few other interests, mainly wood sculpture, furniture design, video production, writing books and publishing a semi-annual woodworking magazine WOODSKILLS. As well as returning to school to follow a one year business program, my woodworking continued.

My woodworking (2012-2018) followed a different path where I embraced modern, contemporary design. In this intervening period, I entered furniture design shows with very contemporary console table and chair designs. The years went by while I yearned to revisit that original cabinet on stand and hopefully make another. I had even developed a set of plans and drawings of the cabinet at the time thinking it would be a matter of a few weeks before I could start on another. Fast forward to late 2018 and I finally set aside time to fulfill this build. The following are progress shots. This version of the cabinet on stand has a slightly modified interior layout than the original. The stand is configured differently only because it was possible to do so and I wanted it to be both different and unique. A couple of new additions are a hidden, secret compartment, inlay on the front apron of the stand and the cabinet floats on the stand. Otherwise, the design follows the original piece created back in 2012.

Installing knife hinges in 2018 version of cabinet on stand

Fitting door panels an creating lip and rabbet where they join.

Interior layout of new cabinet mocked up on cabinet base (using a few of the tools I design + make).

Cabinet mocked up and drawer fronts fitted. Hidden compartment also visible below right-hand drawer compartment.

New set of three dovetailed drawers created (at bottom).

New dovetailed drawers fitted into respective drawer compartments.

The legs, aprons, rails for stand are mortised and prepared for loose tenon and dowel joinery (using modified horizontal mortiser).

Progress checklist (whiteboard and dry erase markers) on one of two wall-mounted hand tool cabinets.

Creating mortises for drawer and door pulls ( cocobolo heartwood and sapwood combination)

French Polish process for door panels and cabinet sides.

New version of cabinet completed. Note the dropped front apron with inlay and floating cabinet on side rails.

Cabinet with figured Big Leaf maple door and side panels and cocobolo pull. Cherry stand with inlay.

Interior of 2018 cabinet. Compartments are flipped from 2012 cabinet. Secret compartment behind the small blue cup at lower right.

The new cabinet on stand seen here. Final detail was the addition of a single, small bullet catch at top of right-hand door.

So I've fulfilled my requirement of building a Krenov-inspired piece of furniture every six years or so 👊😉

Tuesday, October 2, 2018

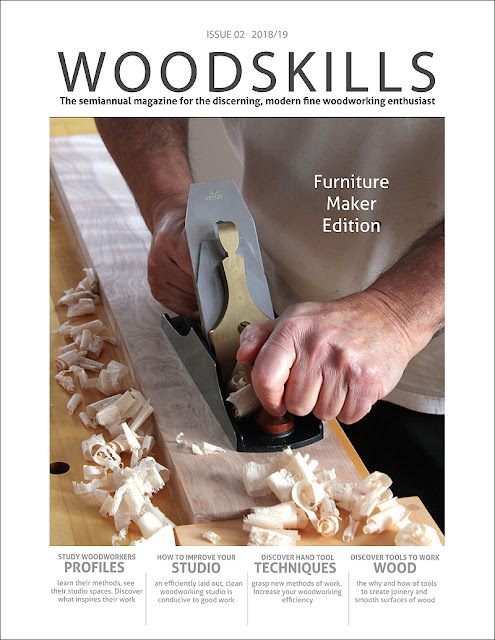
WOODSKILLS Issue 02 - now available!

The idea was hatched a year or so ago. A new magazine catering to the discerning, fine woodworking enthusiast. It was an idea that slowly developed and at one point became a reality. So a small team and I have been working at this and are happy to announce that the latest issue of WOODSKILLS woodworking and furniture making magazine is now available. Some of the features in this Furniture Maker Edition include furniture maker articles, profiles of accomplished furniture makers, best studio practices, contemporary furniture design, gallery, vacuum veneering, Moxon vise build, sharpening + woodworking strategies, wood selection strategies and social media for furniture makers. The terms studio and workshop are used interchangeably throughout the magazine. WOODSKILLS is a semi-annual publication, published twice yearly in late spring and fall.

As a follower and practitioner of James Krenov style of work and methodology, both hand tool and some machine techniques are included. Although the vast majority of articles refer to hand tools, machinery is not excluded. I find this to be a more realistic approach in this day and age. Machines can do the grunt work whereas hand tools are used to create joinery, shape and finesse furniture components, smoothing surfaces, etc. Advertising is at an absolute minimum and consists of curated advertising, a term gleaned from the art world. Advertising must reflect practices and products that our readers and the team at WOODSKILLS could use or include in their own workshops and studios. Available through woodskills.com (digital) or Amazon (print version) or Blurb (premium print version).
 
Furniture Designer + Maker Profiles
Darrell Peart, Craig Thibodeau, Jan Lennon, Brian Greene
Workshop Setups & Best Practices
Furniture Maker Articles
Vacuum Veneering
Furniture Design Gallery
Contemporary Furniture Design
Moxon Vise Build
Sharpening + Woodworking Strategies
Social Media for Furniture Makers

WOODSKILLS Issue 02 woodworking magazine

Instagram: woodskillsmag 
Twitter: WoodSkills
Facebook: WoodSkills 

Thursday, July 19, 2018

Pursue your passion...

As a few of you may know, my woodworking and furniture making career is the second one of my life. A long, first career in the hi-tech industry preceded my current career. It is difficult to view life through a rear-view mirror but I often think of how it would have been if the leap had been taken earlier on. When I began in hi-tech, technology was rapidly advancing and I could not absorb enough of it. My life revolved around computer technology and software. I worked for possibly the best multi-national computer firms and there was a mutual respect of what we brought to each other. Hi-tech today is quite likely the same where change is fast and furious. However, sometime in the middle of the hi-tech career I began to realize that grasping the latest technology was becoming a full-time job. It became increasingly difficult to keep up with the latest in hardware and software. I shrugged this off and continued on the journey, after all I did need a career and a pay cheque. My performance was above par but it became obvious I could not keep the façade going for several more years. The technology was just not as exciting to me anymore. I felt something was lacking in my life and began to seek a creative outlet instead.

A short time later I discovered woodworking through an evening class and was smitten. The creative aspect of woodworking and making tangible objects with the hands was the part lacking in my life. My focus began to turn to woodworking and the hi-tech career simply devolved into a series of jobs. One thing led to another, I launched a small part-time woodworking business over 20 years ago, it grew but not enough for me to leave hi-tech. The struggle of juggling employment with the part-time business eventually took its toll. I retreated and told myself the next step was to become a full-time woodworker. Life gets in the way however! A marriage, new home, a couple of downsizings later and I could finally live the dream of having my own furniture making business.


I often ask myself if I remained in the hi-tech industry for perhaps ten years too long. Looking back, I should have possibly exited hi-tech, struggled at woodworking and not look back. The hi-tech employment became a crutch and it was the pay cheque that kept me from leaving. It is difficult to say what the best path would have been. Circumstances were different in my case, it has all worked out in the end, but the "what if" lingers! Today, I see many younger woodworkers taking the leap into full-time woodworking and commend their courage. After all, why pursue a career you no longer have an interest in. This is one of life's biggest lessons and as mentioned earlier it is difficult to look back through a rear-view mirror. I recently read an article that summarized people's biggest regrets later in life. The regret of not having pursued their dream was high on the list. To summarize, pursue your passion!
So I teamed up with a videographer and created the following video in the form of a 5 minute synopsis of my exciting second career in woodworking and specifically furniture making!


Follow my journey on Instagram: @woodskillsmag
WoodSkills
Pirollo Design

Sunday, June 24, 2018

Makers and furniture...

Not long ago, woodworking was considered to be in a downward spiral of diminishing followers and practitioners. The pundits were proclaiming the demise of woodworking as a hobby and how fewer young people were taking up woodworking and interested in building their own furniture. Why bother, with so much commercially mass-produced furniture available at reasonable prices. In addition, style trends come and go and being saddled with an out of style furniture piece became an issue. Staying on top of style trends has become instilled in us through the proliferation of interior design and renovation shows on television. Furniture has slowly become a disposable or recyclable object instead of a heirloom piece to be handed off to future generations. When you think about it, this trend flies in the face of environmentalism and celebrates the creation of even more trash. Out of all this doom and gloom rose the maker movement.

This younger generation of makers has slowly begun to appreciate the creation of things with their hands.  The increased waste going to landfills brought awareness to the never-ending cycle of consumerism. Let's face it, people are much less likely to throw out something they have created themselves. The virtues of designing and making an object has returned people to their heritage of being self-sufficient, inventive and to not be reliant on industrially produced goods. Through handcrafting, people could imprint their own mark on an object and customize the design to reflect their own aesthetic. The current maker movement is simply an evolution of the arts & crafts movement which has defined creative people for countless decades. The maker movement is an updated form of the craft movement where new materials, technology and ideas are incorporated into craft.


A spin off of the maker movement has been the return to creating one's own furniture. In fact, a large and growing segment of the maker movement revolves around designing and building furniture. The best part of this is how young people have once again embraced the creation of their own furniture for reasons different than in the past. In the past, the younger consumer could not afford furniture so instead built their own. Today, the reasons for building your own furniture revolve around handcrafting, channelling creativity into a furniture design, and the process of creating an object. It isn't so much about the result but the experience of getting there. Younger makers today are turning furniture design on its ear by shunning age old design constructs and paradigms, and instead embracing a fresh outlook on furniture design.


In the past, bolder and radical furniture designs were the product of reclusive studio furniture makers with limited means of communicating with one another. Today instead, younger makers are informed primarily through social media. Practicality and functionality of design have become the new criteria for furniture design. The furniture of this new generation of makers embraces universality and democratizes design. Social media plays an important part in design today within the maker movement. Through social media, furniture designs have become instantly available to both inform and influence other makers. Through social media, makers can quickly adapt an existing design to their own aesthetic or style. The process of fleshing out designs is considerably accelerated through social media and democratization.


So from what I observe, things are looking up for furniture making and woodworking in general. There is a resurgence occurring in this decades old creative outlet. A new awareness of the virtues and benefits of creating objects using wood as a medium is occurring. I am fairly active on social media and an often awed by radical new furniture designs from this new maker movement. Along with this, the democratization of design will hopefully benefit us all as we can extract elements of shared designs to incorporate into our own work.

Norman Pirollo
WOODSKILLS Magazine
www.woodskills.com
@woodskillsmag

Thursday, November 2, 2017

The evolution...

Several years ago, 2006 to be exact, Michael Dresdner contacted me to ask about profiling me in an upcoming Woodworker's Journal online publication. Of course, I jumped at the opportunity to talk about my woodworking and how I got to where I was at the time. I was transitioning from primarily being a box maker to furniture making and the reasons for this shift in direction were discussed in the interview.


Jewelry Box Build

In that period, I had completed a series of courses at a high-end furniture making school and began to use hand tools more in my work. I recall that the year 2006 was an important juncture in my woodworking. I had embraced the Krenov philosophy and his methods of work. Reading and attending the fine furniture making school inspired me to increase the complexity and scale of my woodworking. I also learned to slow down my woodworking and focus instead on each and every piece rather than applying myself to creating in batch mode ( multiples). So my direction changed dramatically in the years 2006-2008 to where I now design + build one-off furniture pieces exclusively.

The most important takeaway from the interview would likely be the last line: “If you are tired of your day job,” Pirollo advises, “do what I did. Pursue your passion instead.” To this day, I completely believe in this quote. It is never to early to pursue your passion. Get a head start, so if unforeseen circumstances affect your livelihood (career), you will be prepared.  Early on my hi-tech career, I pursued many woodworking courses at the college level, set up my own workshops and struggled and worked at learning the woodworking trade. After experiencing a total of 3 downsizings, I gave up on my hi-tech career and moved on to a career in woodworking. This had been my Plan B all along 😉 The important part is that I was well prepared to launch a second career. You never know where fate will lead you!

I'll let you read the article.
Norman Pirollo: The Refined Edge of White Mountain


Saturday, October 14, 2017

Cabinet Build Class

I have recently compiled a series of 16 videos into an online class. The subject was a recent display cabinet build. The design and build of the striking Krenov-inspired display cabinet seen below is discussed and demonstrated. The contemporary styled display cabinet features veneered sides and doors. The veneers selected are highly figured although they can be substituted with alternative veneers. The frame and panel back adheres to the Krenov principle of properly finishing the back of the cabinet. James Krenov is widely known for his classic cabinets on stand as well as the incredible attention to detail he brought to furniture making. He also brought a unique philosophy and vision to furniture making of which I heed and practice. A large part of this veneered display cabinet has been created using an assortment of hand tools although some machinery is used in the initial wood preparation stage. Follow me as I describe the steps involved in creating a masterpiece veneered cabinet on stand.


The following topics are covered in detail in this 16 part design and build class:
  1. Inspiration and design of the display cabinet
  2. An overview discussing components of the cabinet
  3. Wood selection and resawing veneers used in cabinet
  4. The advantages of using veneers over solid wood
  5. Detailed information on creating and using resawn veneers
  6. The process of applying veneers to the sides and doors
  7. Implementing bake-ins to create panels with hardwood edges
  8. Hardwood edging and the veneer press
  9. The veneer press and joinery used in the cabinet
  10. Card scrapers and the use of a shop-made drilling guide
  11. Dowel drilling guide in-depth
  12. The case construction process
  13. Frame and panel construction of the back panel
  14. Back panel detail and installation
  15. Final case assembly of the display cabinet
  16. Installation process of knife hinges for the doors
Each video segment addresses one aspect of the cabinet build. The design process as well as the methodology behind the build are addresses. This is not simply a class on how to build a cabinet on stand. The class will inform you of a similar design process that James Krenov used in his own work. Since I am an ardent follower of James Krenov, the practices I use in this cabinet build closely follow those of James Krenov. Discussions and demonstrations describe how the design of this display cabinet originated and the design considerations in its build. Information on wood selection and preparation as well as the joinery used in this cabinet is covered in detail. Tips and techniques acquired over several years of creating this style of cabinet are shared in this class. The process of creating and applying veneers is covered as well as information on the installation of knife hinges. More info in the Tutorials section of my web site.


Wednesday, October 11, 2017

Furniture Design Course

In this new course, I cover the furniture design topic. This is a topic near and dear to me as I believe that good design is essential in a quality furniture piece. Good design also minimizes wasted resources and provides a furniture maker with essential feedback and pause when creating furniture. Loosely translated, the design process keeps the maker from rushing into a potentially flawed furniture design. The checks and balances give pause to the process as well as streamlining the build. Developing your own style and furniture aesthetic is also covered. Selecting the right woods for your furniture design is critical in determining the appeal of the final furniture piece.

As with most woodworkers, I was anxious to build furniture early on. With the passage of time and several furniture projects completed, the anxiety of simply creating work had passed. It was far more important to create a well-designed and striking piece of furniture. So I delved into furniture design, studied with some renown furniture makers, and used this knowledge to establish a furniture design process that works.


Furniture Design Course

In the online furniture design course you will learn the skills necessary to design and create your own unique furniture. Learn to develop your own style of furniture and aesthetic. Over 2 hours in total. Course features videos on these topics:
  1. Furniture design overview, the history of furniture design
  2. Becoming familiar with the furniture design process
  3. Understand design process, bring your furniture designs to next level
  4. How to select wood for a furniture design
  5. Use of mockups and prototypes to develop a furniture design
  6. In-depth use of mockups to develop a furniture design
  7. Determining a furniture style for your own furniture designs
  8. Selecting a furniture style and aesthetic
  9. Developing a furniture design
  10. Getting the proportions right in a furniture design
  11. Using the dynamic design process in a furniture design
  12. Use of maquettes and prototypes in a furniture design
  13. Use of templates and CAD when designing your furniture

Friday, August 18, 2017

1860's Sawmill & Cabinetmaker shop

This past week while camping I toured an authentic 1860's pioneer village in the area. We camp in the same area each year and try to visit Upper Canada Village while there. With each visit I learn something new or pick out a detail I missed on previous visits. One favorite stop is the authentic sawmill which continues to produce boards to this day. Most of the wood is used within the village. Watching the water-powered bandsaw in operation continues to amaze me. The innovative features built-in to process logs into boards are nothing short of ingenious. There is also a system to use trucks on wheels to transport logs in , then roll them onto the bandsaw platform for ripping. The videos below shows the bandsaw in operation and water turbine at the lower level. Blade is stationary except for up and down movement. The log is advanced into the blade through a system of geared steel wheels and detents. The bandsaw is powered by a shaft driven by a turbine wheel. The water is piped in to the sawmill through a system of square wood pipes which increase the velocity of water to spin the turbine. Water begins at one height when entering the sawmill and exits at a lower level. This is what causes the water to increase in velocity. The bandsaw mill works well with old growth white pine brought in from another area.

Video here:  Water-Turbine

Video here:  Water-powered 1860 bandsaw

Another favorite stop is the authentic cabinetmaker shop where furniture is continually churned out, albeit at a much slower pace we are familiar with. Most of the furniture produced in the shop is used in the authentic pioneers village. All furniture is created with hand tools as relatively no woodworking machines existed in this era. The Industrial Age was just beginning. Watching the cabinetmaker (David Jones) and apprentice provided a real appreciation for a slower, manual form of woodworking.


So I had the opportunity to do a short film of David Jones (resident master cabinetmaker) and apprentice. I asked a few questions while filming. They are currently working on a side table with frame and panel doors and drawers. All joinery is either pinned mortise and tenon or dovetails.
I have probably visited this Cabinetmakers shop four times to date and continue to enjoy discussing with the resident cabinetmakers their work methods and current projects.

Video here:  1860 Cabinetmaker Shop

I then visited the blacksmith shop which also doubles as the ferrier shop for the horses in the village. Had a good talk with the blacksmith. At the time he was forging a keyway for a geared wheel in a piece of machinery used in the crop fields of the village.

Tuesday, July 25, 2017

Bench stops (12th anniversary)...

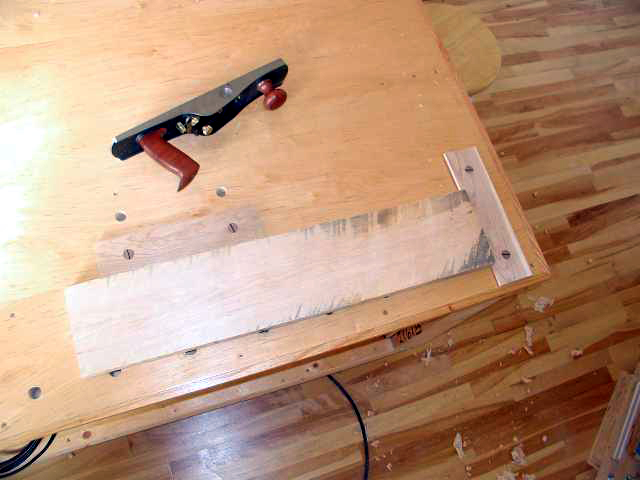
In 2005, I developed this system of bench stops as a simple alternative to installing a tail vise on a workbench. So I've been using this system of bench stops for 12 years now, it will be the 12th anniversary shortly! The system is set up on one of my original workbenches which happened to be my main workbench at the time. This particular shop-made workbench did not lend itself well to incorporating a tail vise so I told myself there had to be a better way to hold boards firmly while hand planing. Apologies for the vintage photography, but I wanted to keep the article period correct :)

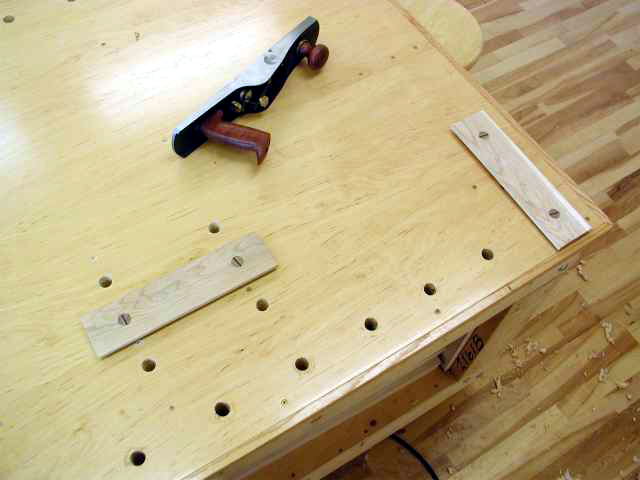
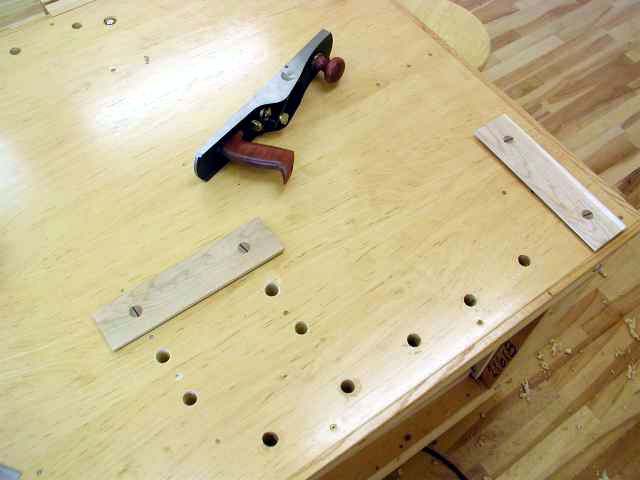
This alternative tail-vise setup is used when face planing boards. Most flat, regular benches can easily be modified to incorporate this hand planing setup using bench stops ( Roubo style). Photos below are of the bench stop setup on the workbench in my workshop. This bench has been modified for adapting the two bench stops. Adapting a bench can be expanded for longer bench stops, more holes for versatility, etc. I chose this particular hole spacing for the type of work I do. I am also left-handed and plane left to right, therefore I set this up on the back side of my bench which is unencumbered by a face vise ( the face vise at front of bench ).

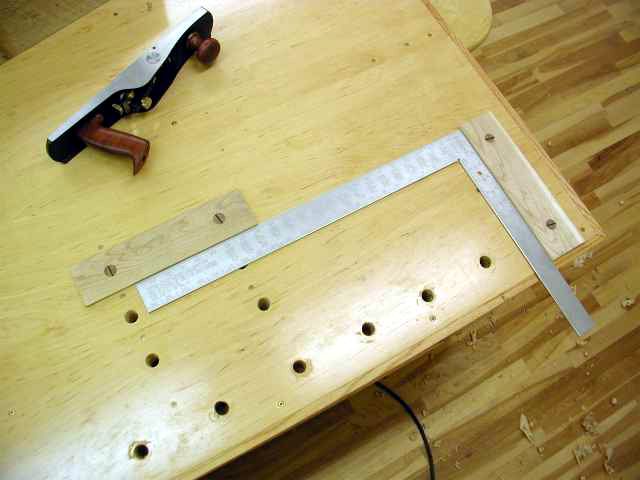
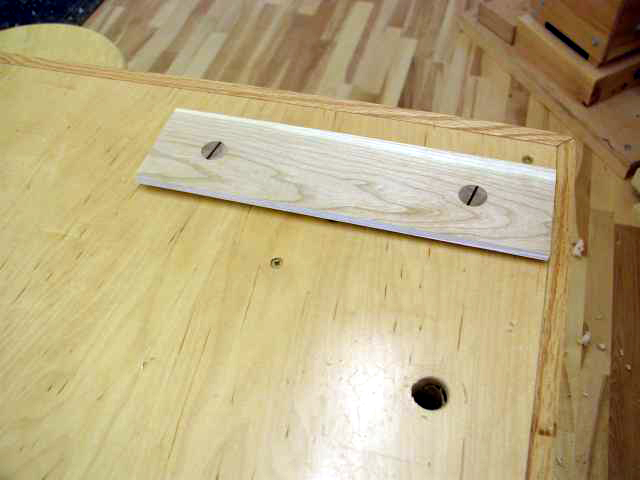
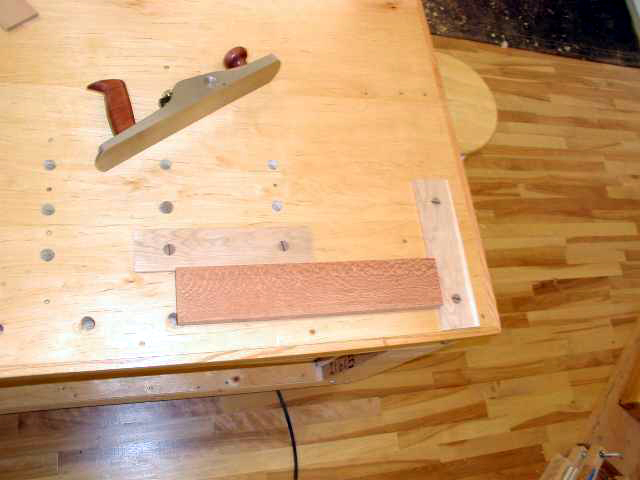
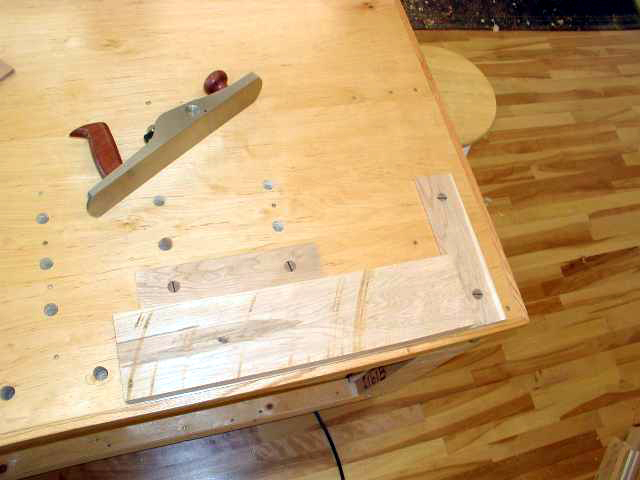
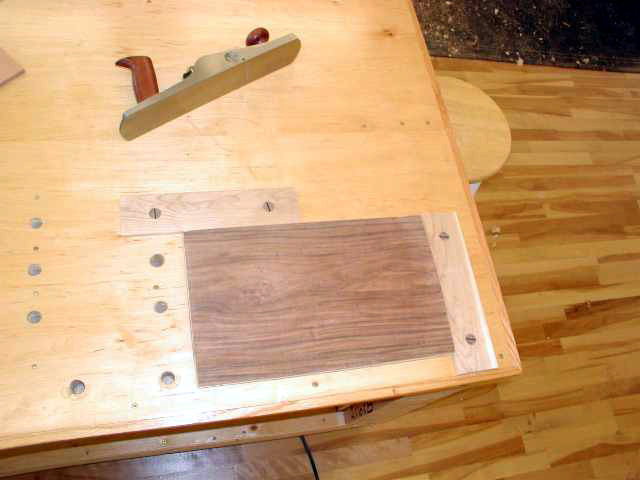
It is critical to get the 3/4 in. dowel holes square to the bench and in-line with each other, to ensure that the 12 in. bench stops are perpendicular to each other. The side bench stop does a great job of preventing the board from rotating sideways while hand planing with diagonal strokes. It has a large bearing surface to keep any size board from rotating. The side bench stop is also movable within a 12 in. span on 3 sets of holes, allowing for narrow boards and wider boards (2 in. to 14 in.).

Handplaning-1

The side bench stop can be swung around towards the front bench stop with a parallel set of holes, this is to accommodate shorter boards. Pictures above and below provide a better explanation.

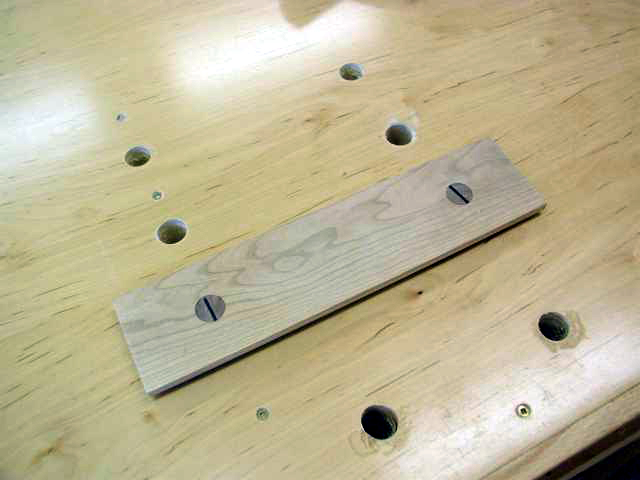
The wide front bench stop also serves to prevent the board from rotating or shifting sideways as it has a large bearing surface for the front edge of the board. Bench stops (front and side) are friction fit so they can be raised (1/4 in. to 3/4 in.)  to accommodate thicker boards, very much like a bench dog. Otherwise, the minimum height of the bench stops would be approximately 1/4 inch. The hole spacing is arbitrary and based on the type of board sizes I typically hand plane in my own furniture making. two inch long birch dowels are glued in the bench stops using ebony wedges. The wedges are inserted into kerfs created in the ends of the dowels for tightness. Kerfs at the ends of the dowels are cut on a bandsaw.

A benefit of having a board simply against bench stops is that you really cannot drag the plane back in your strokes since it would pull the board back. This trains you to lift the handplane instead of dragging it back. The only wear on the blade then is from the forward stroke. Also you eliminate the tendency of bowing a thinner board caused by clamping between bench dogs and tail-vise and distorting the board while planing. You also gain more tactile feedback and control of your planing and it becomes easy and quick to re-orientate the board end for end or flip it over, etc.

Handplaning-1

Typical bench stop setup to act as a tail vise.

handplaning-2

More holes can be added to allow for very short boards as done in bottom pictures. It is then a matter of swinging the side bench stop around towards the front bench stop. The spacing and location I have selected is optimized for the length and width of boards I typically handplane in my furniture making.

Bench Stops 3

The bored 3/4 in. holes can also be used for bench dogs and holdfasts for irregular sized pieces.


Align side bench stop to be perpendicular with face of front bench stop using a large square to mark holes. This will ensure the complete edge of the bench stop is against the board to be planed.

Planing stops 4

Side bench stop set to narrowest width, closest to edge of bench.

Planing Stop 5

Bench stops can be raised or lowered as conventional bench stops for thinner or thicker boards.

Planing Stop (small board)

A short, narrow piece of lacewood being planed.

Planing Stop 6

Parallel set of holes bored to accommodate shorter and wider boards shown above. It is recommended to lay out all the holes you will need for this system and then drill them. This method ensures that all holes are square and perpendicular to each other and the front bench stop.

Planing Stop 8

A small, wide panel being face-planed.

Developing this alternative tail vise idea led to an article on bench stops and jigs I wrote for Fine Woodworking Magazine. The 4 Bench Jigs for Handplanes article was published in early 2009.