Showing posts with label moxon vise. Show all posts

Tuesday, November 12, 2019

Kumiko Demo

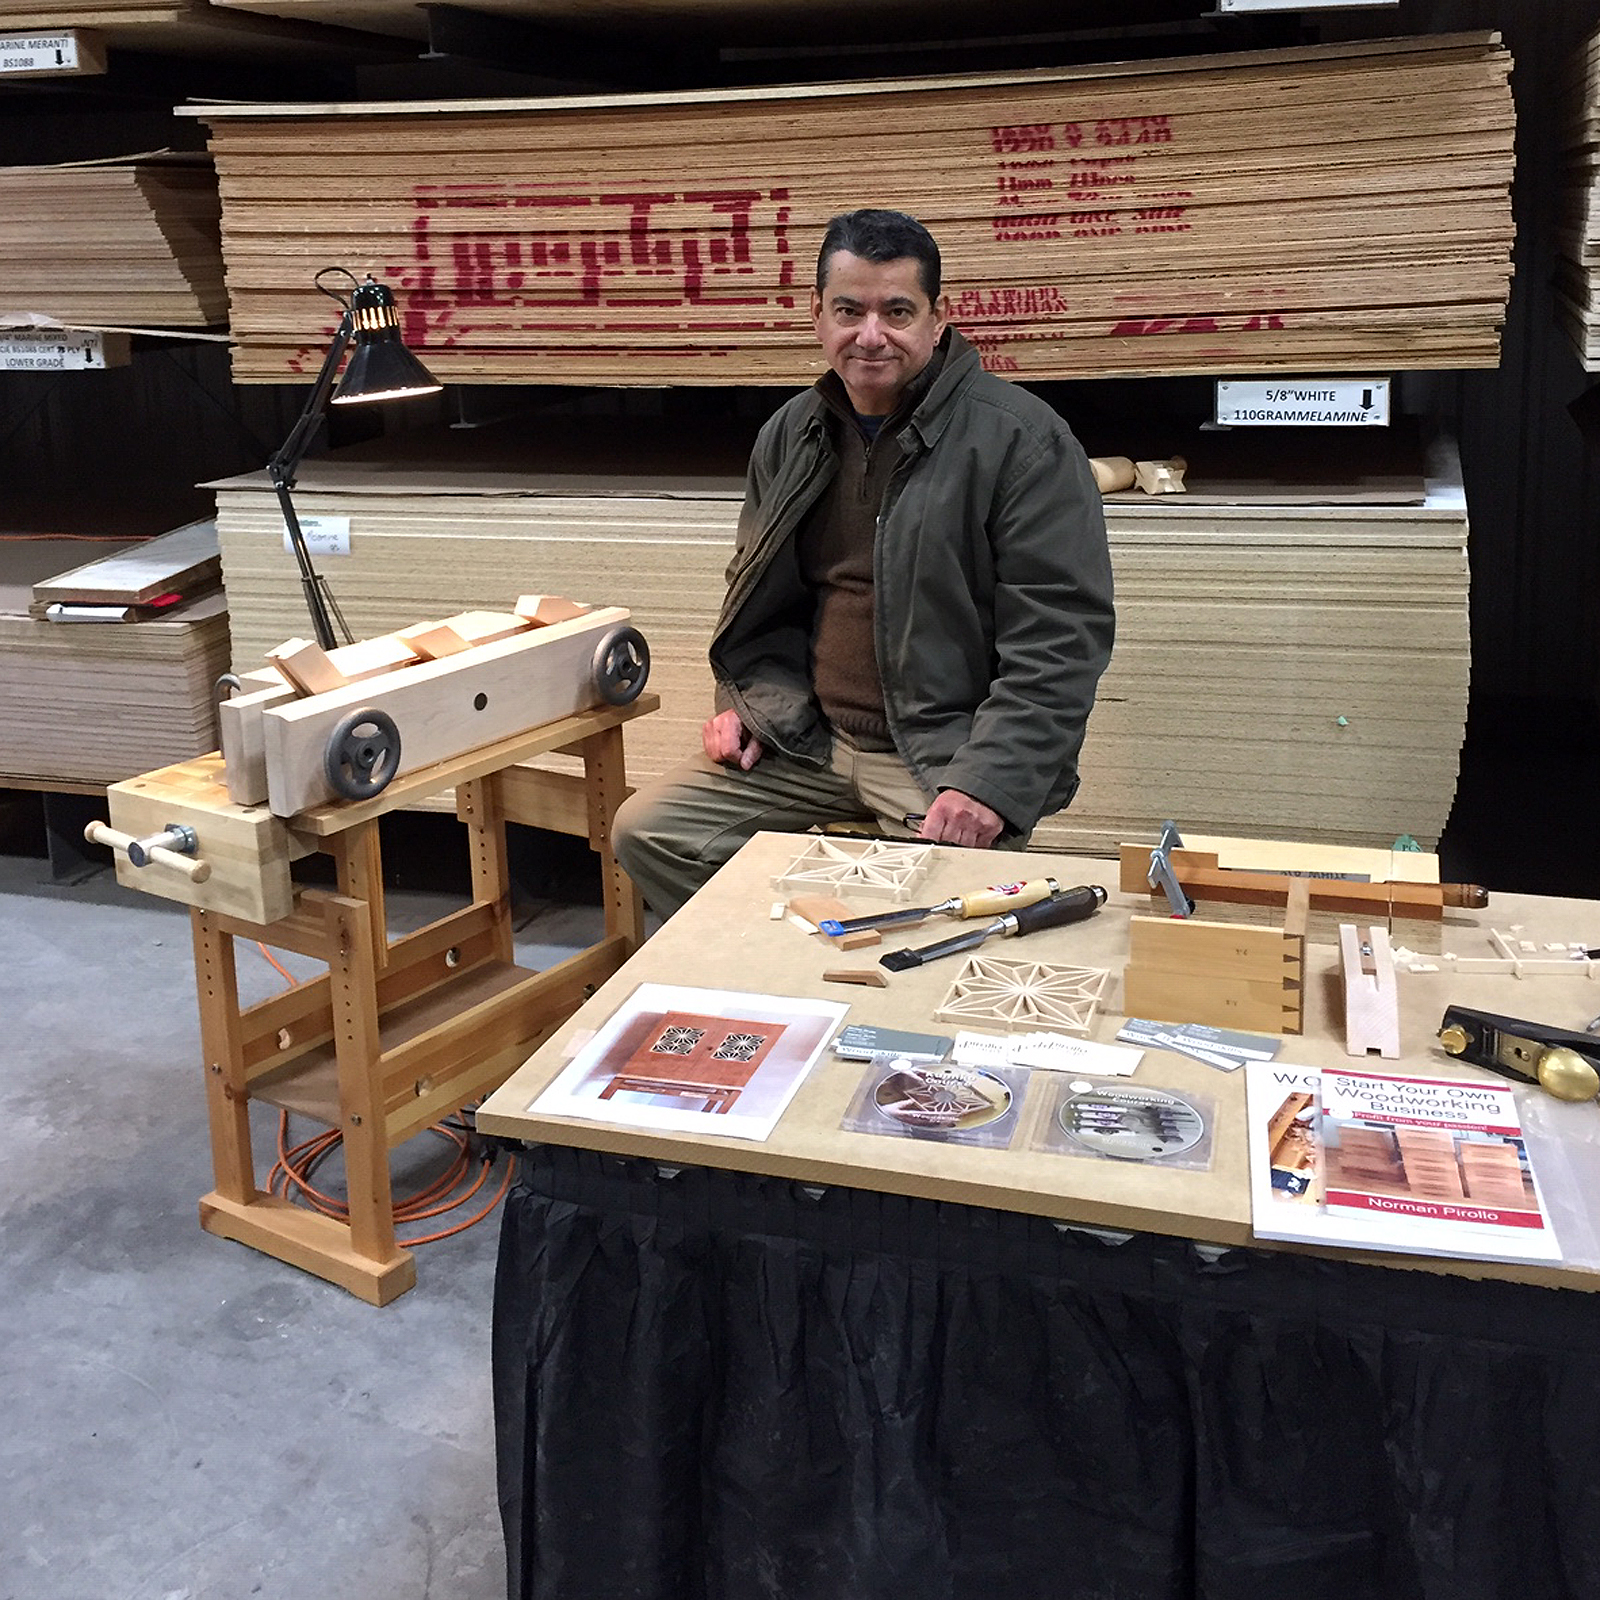
I came across an opportunity to both demonstrate and talk about the traditional Japanese craft of Kumiko at an annual woodworking event. In discussion with a local wood supplier and mill (Wood Source Ottawa, Ont.), they mentioned their upcoming annual open house and how they encouraged local vendors and artisans to participate. I quickly signed up at the opportunity to present and share my passion of Kumiko. Proceeds from the open house silent auction also went to a good cause, so this became another motivation for me to participate. I truly enjoy discussing woodworking and love to engage with people and hopefully motivate them to either start or continue to pursue woodworking.


I had several days to prepare and had sufficient time to create enough Kumiko components to last through the open house. The opportunity also challenged me to devise an innovative way to hold Kumiko guide blocks without having to continually unclamp and clamp the critical guide blocks to a vise. I was able to enlist my Moxon vise along with a small workbench to perform this. The opportunity also provided me the impetus to market a Kumiko Course I had been working on. I could offer the video-based course at the open house! So this all came together and I enjoyed two days at the open house engaging with people and introducing them to the centuries-old traditional Japanese craft of Kumiko.


At first glance, people would be in awe at the small scale of components in Kumiko. Their first reaction was how intimidating and difficult it was to tackle. After engaging and demonstrating the ease of forming and shaping the small interlocking parts, their fears vanished. Often, people need to have a technique presented in a live setting to grasp its intricacies. I get this and can easily relate to this form of learning and visualization. Techniques of safely using a wide chisel to pare wood were also demonstrated, being the core of Kumiko component creation.


I enjoyed the experience and in the process made a few local contacts. Hopefully, I have encouraged a few people to tackle Kumiko and woodworking in general. Working in a solitary studio environment often keeps me from interacting with like-minded people that share a common interest in woodworking. People enjoy sharing their passion and the timing of this open house was ideal since I was between projects and needed a break from my furniture design + making.

Link to  Kumiko Course

Tuesday, October 2, 2018

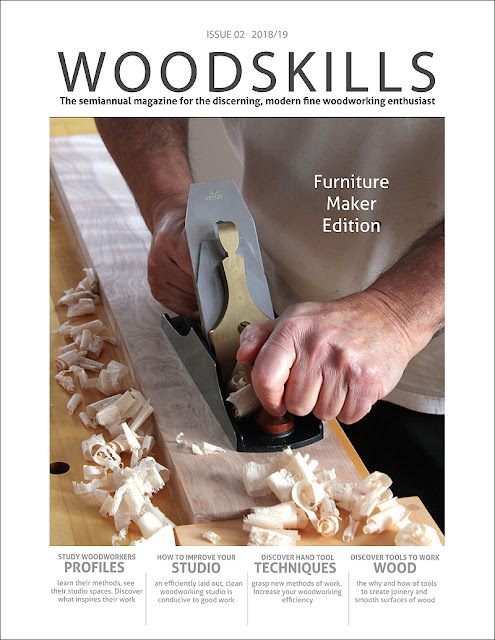
WOODSKILLS Issue 02 - now available!

The idea was hatched a year or so ago. A new magazine catering to the discerning, fine woodworking enthusiast. It was an idea that slowly developed and at one point became a reality. So a small team and I have been working at this and are happy to announce that the latest issue of WOODSKILLS woodworking and furniture making magazine is now available. Some of the features in this Furniture Maker Edition include furniture maker articles, profiles of accomplished furniture makers, best studio practices, contemporary furniture design, gallery, vacuum veneering, Moxon vise build, sharpening + woodworking strategies, wood selection strategies and social media for furniture makers. The terms studio and workshop are used interchangeably throughout the magazine. WOODSKILLS is a semi-annual publication, published twice yearly in late spring and fall.

As a follower and practitioner of James Krenov style of work and methodology, both hand tool and some machine techniques are included. Although the vast majority of articles refer to hand tools, machinery is not excluded. I find this to be a more realistic approach in this day and age. Machines can do the grunt work whereas hand tools are used to create joinery, shape and finesse furniture components, smoothing surfaces, etc. Advertising is at an absolute minimum and consists of curated advertising, a term gleaned from the art world. Advertising must reflect practices and products that our readers and the team at WOODSKILLS could use or include in their own workshops and studios. Available through woodskills.com (digital) or Amazon (print version) or Blurb (premium print version).
 
Furniture Designer + Maker Profiles
Darrell Peart, Craig Thibodeau, Jan Lennon, Brian Greene
Workshop Setups & Best Practices
Furniture Maker Articles
Vacuum Veneering
Furniture Design Gallery
Contemporary Furniture Design
Moxon Vise Build
Sharpening + Woodworking Strategies
Social Media for Furniture Makers

WOODSKILLS Issue 02 woodworking magazine

Instagram: woodskillsmag 
Twitter: WoodSkills
Facebook: WoodSkills 

Wednesday, January 10, 2018

Moxon vise build...(Pt. 2)

The Moxon vise build continued and the vise was completed a couple of days after beginning the project. There was a considerable delay in determining the optimum length of the vise. This actually held me back since making it too short is essentially non-correctable later. Too long and there is a weight penalty as these Moxon vises tend to be heavy, especially with the Benchcrafted solid iron handwheels. Although the extra mass and weight can be your friend when clamping boards down, portability of the unit is also a consideration. I would need to determine the size of panels I most often worked with. In my work, I never go over about 20 inches in width so I set this as optimal distance between the screws. Then, using guidelines on screw hole placement provided in the Benchcrafted instructions, a final length of 28 inches was decided on. I did follow the suggested screw hole placement in the Benchcrafted instructions, this saved some time. Next was to mark the 3/4 inch screw holes and begin drilling, careful to have the holes in the front and rear jaws perfectly aligned.

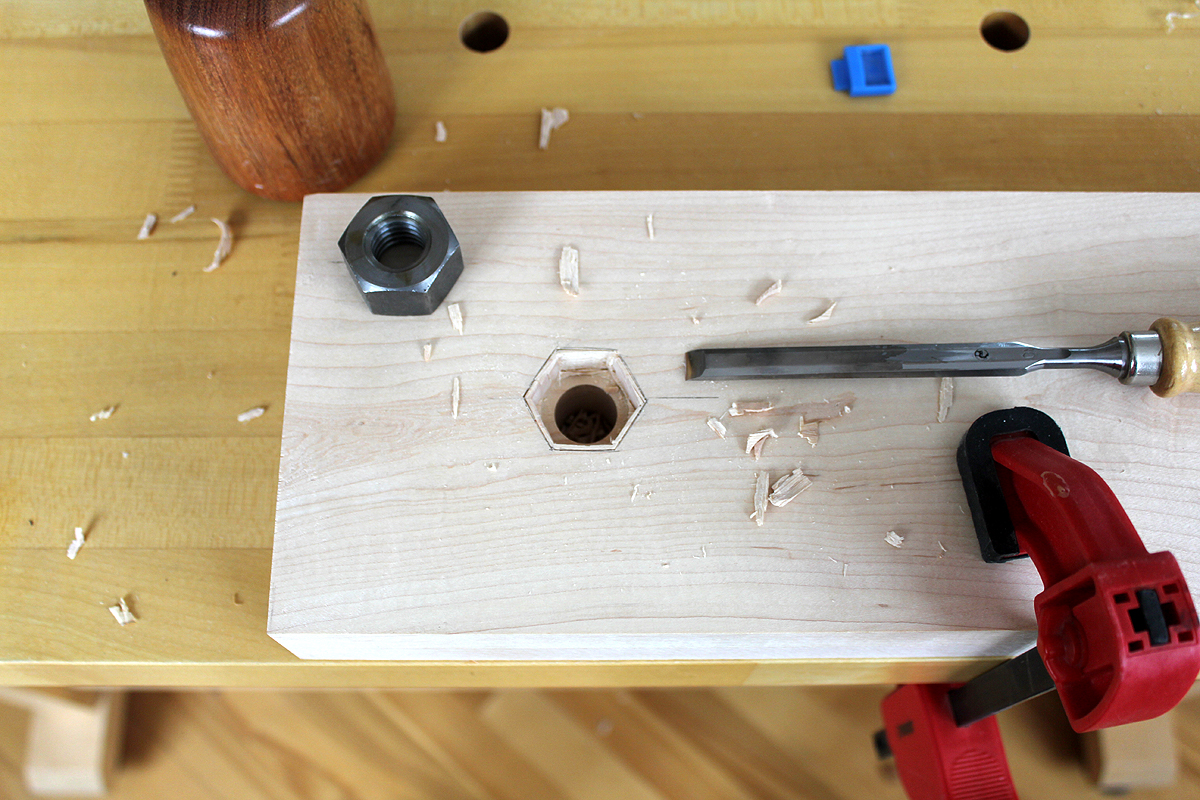
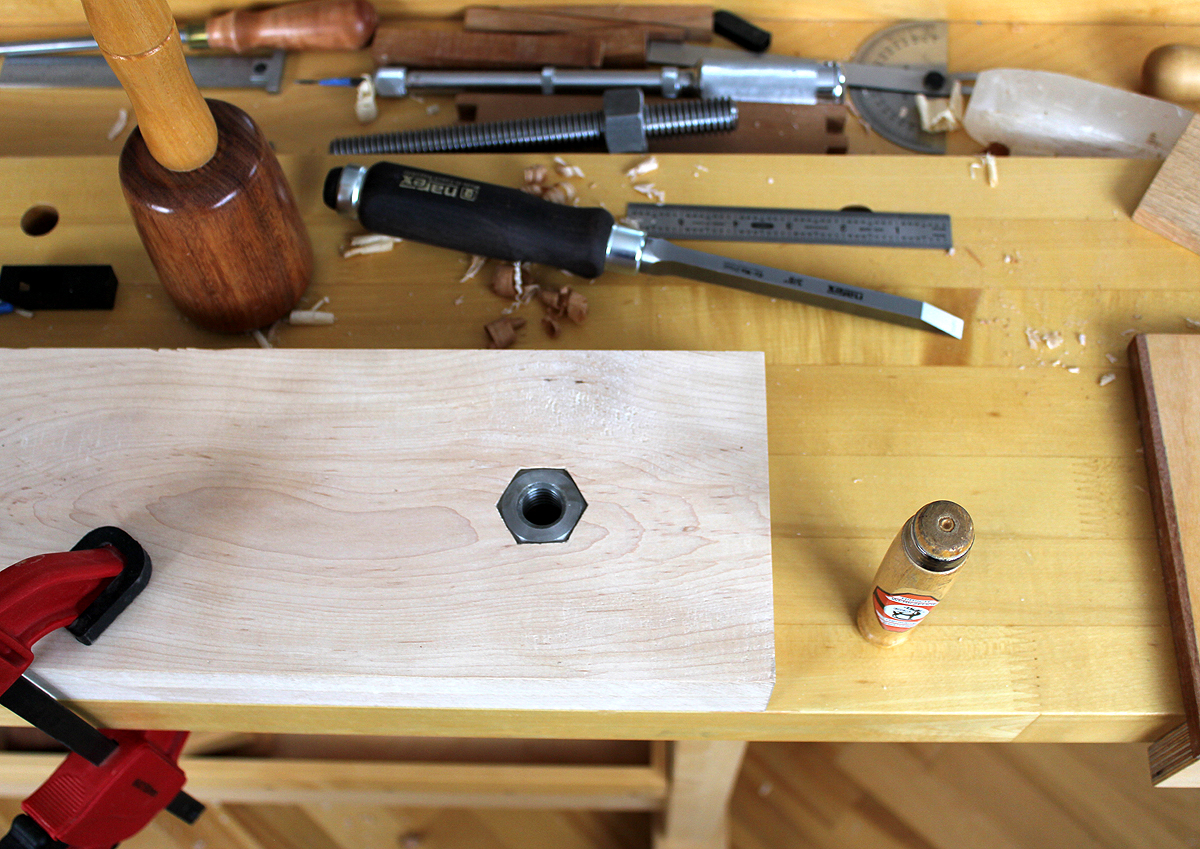
Moxon vise mortise captive nutMortising for the captive nut in the rear jaw inside face was performed using bevel-edge and mortise chisels. Hard maple is well.. hard! In this case, the mortise chisels excelled at hogging out material from the 3/4 inch deep mortise. With a softer hardwood, lighter bevel-edge chisels would have been sufficient. I also oriented the nut so it would align well with the long edges of the rear jaw, mostly an aesthetic consideration. 

Moxon vise captive nut in rear jaw
After test-fitting the Benchcrafted hardware and ensuring it worked smoothly, the next step was to attach a large block of wood to the rear. This block of wood would both stabilize the vise assembly and allow holdfasts to be used to clamp the Moxon vise to the workbench top. Several other intermediate steps were performed, always careful to get alignments exactly correct. There is almost no room for error in making these vises since replacing either of the jaws is both time and material consuming. A more comprehensive article on how I made this Moxon vise will be available at the web site soon.  

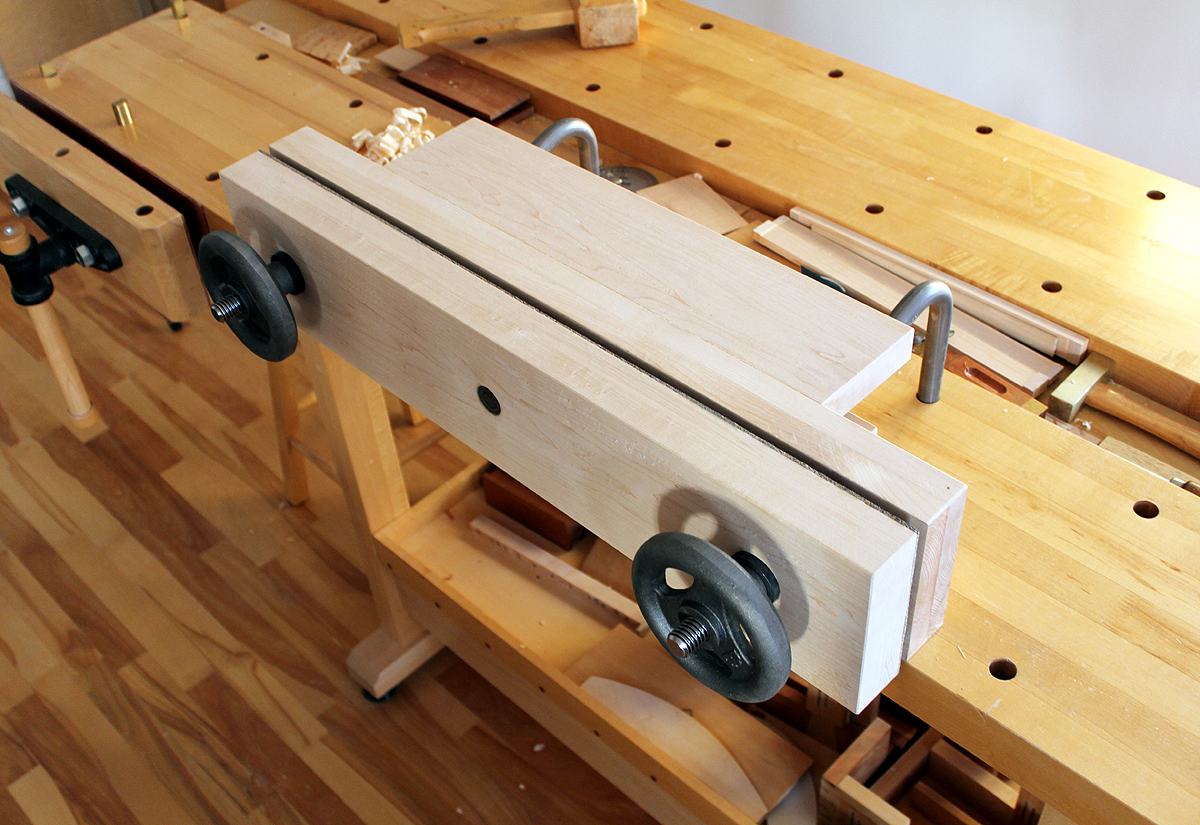
A table extension and vertical support was then added after ensuring the stabilizer was effective at clamping down the Moxon vise to the workbench. The table allows me to extend horizontal boards for marking..i.e. dovetails. I customized the design to use an extra row of dog holes in the center area of my workbench. I have two of these workbenches set as my primary workbenches, so the Moxon vise will be completely portable between benches. The vise can also be located almost anywhere on the workbench surface as the holdfast locations are optimized to clamp the stabilizer block of wood at rear of the vise. I am using Gramercy holdfasts but any holdfasts can be set up for use with the vise.


More detail of the handwheel, screw, and captive nut can be seen above. The table is reinforced below both long edges for maximum support, this to allow for any mallet work. i.e. chopping out dovetails. A large design consideration was to not make the Moxon vise too heavy as I would often be removing it from the workbench top and/or moving it between workbenches. The table size was optimized for this vise and the type of work I do. When designing your own Moxon vise, you will need to determine the size of boards and panels you most often work with. The overall length of the Moxon vise is the most important consideration in its design, it is best to get it right the first time!


A more in-depth article on how I made this Moxon vise will be available at the WoodSkills web site soon. 

Wednesday, January 3, 2018

Moxon vise build...(Pt. 1)

So I decided to build myself a Moxon vise over the holidays. Business slowed and I had the time to get going on this project. A Moxon vise was something on my mind for quite some time, it was simply a case of finding time to make it. Some time was spent on research to determine which version best suited my work methods. It is essentially a straightforward build, but critical to get it right to ensure the time and material investment is put to good use.

I'm not 100% sure of the origins of the Moxon vise design, but it is widely attributed to Joseph Moxon. Joseph Moxon (8 August 1627 – February 1691), hydrographer to Charles II English printer specialising in mathematical books and maps. Moxon's 17th century book. The Art of Joinery first described the double-screw vise. In this historical publication was documented the Moxon vise - a double-screw held to a workbench top with clamps or holdfasts in order to facilitate certain work.

The main criteria for me was to be able to hold work above the standard height of a workbench. Rather than piece together the hardware for the vise itself, I opted for the Benchcrafted Moxon Vise hardware kit as it includes everything mechanical. I would need to supply the wood and shape the vise jaws (chops). This would be for the basic vise. A more complex version with an additional work table behind the vise would involve several more steps. The overall length of the Moxon vise has yet to be decided on, but will be in the 28 to 32 in. range.


So after deliberating on the design, I simply went at it and worked on the front and rear jaws. Not having 8/4 stock available to me, I opted to laminate some 4/4 maple pieces instead. In the past, I have had success with the strength and stability of 4/4 boards laminated together. In selecting the boards, I mixed the grain orientations up so each of the laminated boards would counter the grain of the other board. This, in my opinion, balances out the internal stresses of the woods and keeps it all straight and stable. Laminating one of the jaws here with 4/4 boards. As they say, one never has enough clamps. In the pic below, this was almost the case, but it worked out. I do have other clamps, but for the most part, they are lighter. To be continued...